Or in this case, two.
I first read this tip from Zo (originator of Me Made May): alternate finishing a new garment with fixing up an old one. I remember thinking: how admirable, but how annoying.
In the abstract, it seemed to me like a nuisance — to go from the joy & pride of a newly finished item to the tedium, and perhaps nagging disappointment, of fixing something gone awry or worn out.
But in practice, I’ve been thinking about ways to ‘bundle’ together projects, one to make and one to mend. Probably because winter is dragging on and my mending pile is growing and instead of gleaming at me from shelves of neatly lined stash fabric and yarn, it’s beginning to glare at me from the corner of my bedroom. Motivation to the rescue!
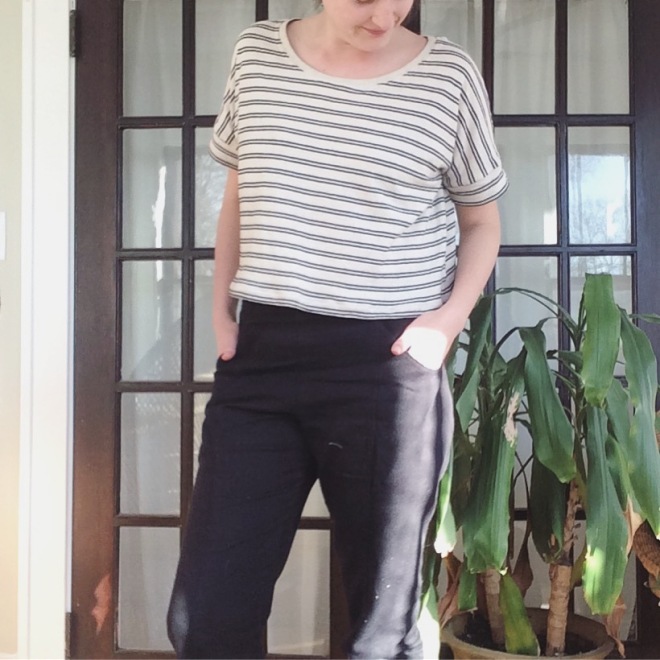
As noted, I have a handy little quadrant for winter wardrobe-related projects, categorized by: need / want / mend / mod. First up to bat in the new (and needed) garment category was a pair of cozy organic cotton terry hudson pants (shown here).
And you know what goes well with plain cotton thread and jersey needles? Two hemlock tees awaiting some mending and modifying (from the ‘mod’ quadrant).
So, when the last threads of the hudson pants had been snipped, I took some time to slip them on and revel in all their long-planned-finally-finished glory, then I cleaned up the scraps, and made room for the tees.
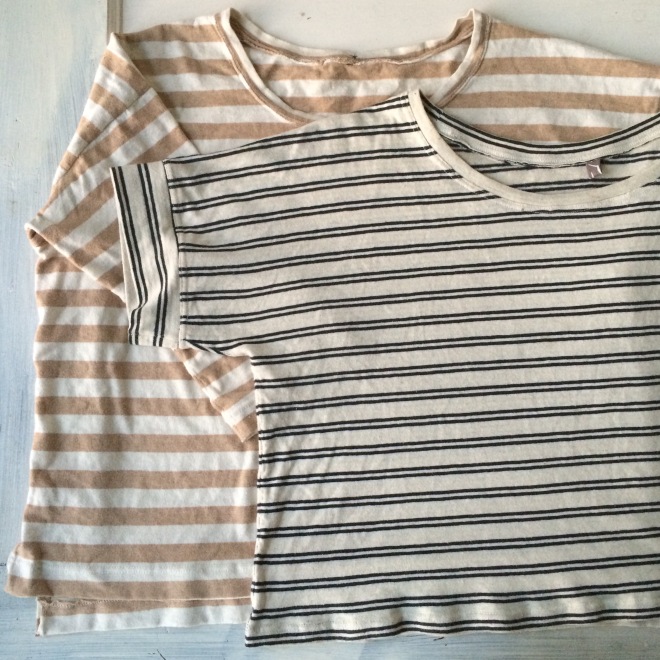
The Hemlock tee by Grainline Studio is a community favorite for sure, with its simply boxy cut and myriad of modifications posted by creative sewists. I’ve made both knit and woven versions in the past few years, and realized I just wasn’t reaching for these two tops very much.
Are you tired of hearing me blab about the benefits of my experience with the capsule wardrobe planner? Well, it really has helped me hone in on what garments I love, what shapes I’m most comfortable wearing, and what is languishing in the back of the drawer. For instance, a warm-weather absolute favorite item of mine is a blue and white striped t-shirt that I got at a thrift store. Something about the cut and proportion is just perfect to me, so I took a few nods and notes from it to make my hemlock tees a bit more beloved.
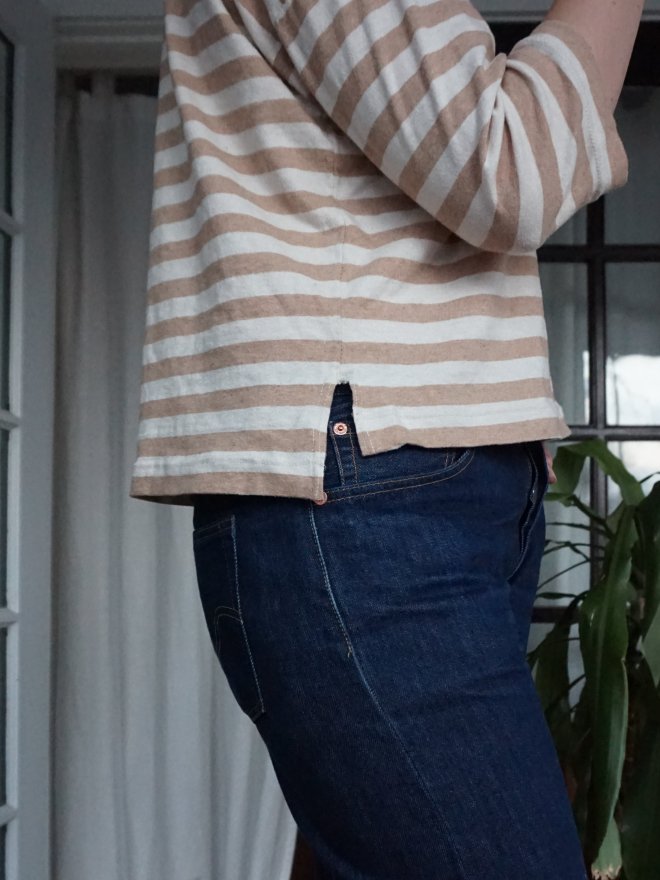
For the brown and cream stripes, that meant chopping off the length at the hem and a little at the sleeves — I was always tucking it and pushing up the sleeves anyway — and creating a split side seam (a favorite detail of mine in general) that is slightly longer in the back.
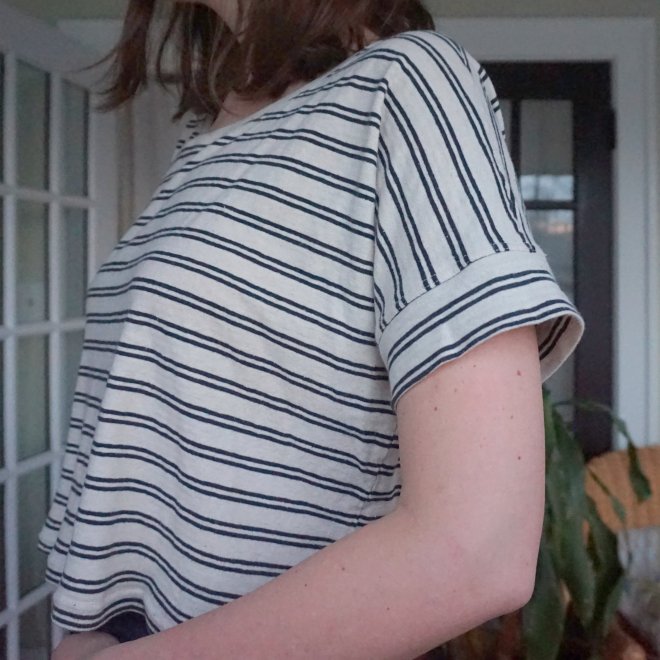
For the black and white striped tee, I had experimented with the shape but I hated the visible zig-zag topstitching and the awkward length of the sleeves I had created. I unpicked the hem and neckband, and cut the sleeves short. I added sleeve bands (using the sleeve scraps!) and re-did the neckband and hem with a twin needle.
In both shirts, I tucked signifiers to distinguish the front and back, which I always think will be obvious when I’m making a shirt, but when I pull boxy tops out of my dresser it irks me that I have to pause and consider the right side. Here’s to making yourself happy with the little things.
And, here’s to discovering that the satisfaction of rectifying your old clothes is truly on par with making new ones, so may I suggest: make one, then mend one (or two).