Exeter cardigan, ode to sheep sylvia

Exeter Cardigan 1

Cabled coziness, fuzzy luxury, place-based wardrobe fulfillment.

I arbitrarily told myself I couldn’t/wouldn’t share photos of my “finished” Exeter cardigan until I finished weaving in the ends. Maybe it was less arbitrary and more motivational (I’m always loathe to weave in ends).

But as soon as I tucked away the most conspicuous yarn ends, I slipped on the sweater for the evening. And then I got up the next day and put it on to fend off the late-winter chill. And then the next day it was really the best fit with my outfit (hallelujah, sleeve and shoulder ease).

Exeter Cardigan back

On and on I reached for this cardigan, swaddled myself in it, even traveled with it, for a solid month before finally & reluctantly ending the loose ends.

It still doesn’t have buttons, but I’m calling it good, wearing it while I hunt for button-mates.

The pattern, of course, is Exeter by Michele Wang from the BT Spring Thaw Collection, with full modification notes here. I’m thankful as ever for knitter friends, for real-life sweater try-ons and internet-based helpful hints. The main change I added was length: to the body ribbing, the pockets, and the sleeves.

Exeter Cardigan front

The yarn is a local treat: squishy, lustrous, taupe-y grey wool, purchased at a local festival in spring 2016. It was surprisingly hard to find a full sweater’s worth of yarn from a local farm at this festival that was supposedly all about the shepherds, but I knew I had a winner as soon as I spotted the table piled with this yarn. Simply called Farmgirl Yarns, the label denoted it was raised and spun on-site by English Gardens Fiber Mill in southern Minnesota.

Everything on the table was undyed, with beautiful natural neutrals and subtle variations in grey-brown hues. I gravitated toward this lot immediately. The name: Sylvia. The breed: 1/2 Blue faced Leicester, 1/4 English Leicester, 1/4 Columbia, noted in neat and swirling hand script.

The natural shine of the yarn made the cabling even more addictive, the plump 3-ply showing the texture with distinction. I dutifully swatched and blocked each of the three stitch patterns as called for in the pattern, and the fit is exactly what I wanted — a little bit longer and slimmer (less ease) than the shown on the model, with excellent drape.

Exeter Cardigan Side

What surprised me, though, is that the yarn is really softening with wear. And by that I mean, it’s already pilling more than any of my other hand knit sweaters. It doesn’t bother me so much as perplexes me, because with the little bit I know about Leicester breeds I had thought they were longwool and thus a heartier fiber. I have a pretty high tolerance for wool, not one who needs merino next to skin, so I thought it would be great to have a cabled cardigan in a more substantial wool that would wear really well.

It wears beautifully in its cozy comfort, sheen, and drape, but it has quite the fuzzy halo when you look up close, and will need regular combing on the sleeves and lower ribbing where the most friction occurs. I had thought that pilling was mostly the result of shorter fibers coming free with wear, and maybe that’s true with this yarn, but I wonder if it’s more due to the construction — a ‘softer’ spin that makes the yarn more open and pliable, thus pillable?

Of course, this will hardly stop me from wearing it, it’s more of an observation and perhaps a consideration for the future to do a bit more of the dirty work with a swatch before casting on a whole sweater. I think Karen was really on to something with that hot tip.

One thing I know for sure I’ll take with me to the next big knit: tucking in my name and date, as noted, a little way to make my mark and meld my work with that of all those in the supply chain, from Sylvia the sheep to the spinnery and the shepherd.

Exeter Cardigan Pocket Detail

Here & there, vol. 3

Here

Is the world melting or is it just some of the snow?

The past few weeks were challenging on many levels, and turning to manageable, tactile, creative tasks has helped me get through it. Of note:

IMG_1928.jpg

The finishing touch on ultra cozy Hudson pants (the better to spend a Saturday morning snuggling & writing postcards to Senators).

IMG_1857.jpg

Finding my own way to commemorate 2017. I think it’s critically important that we continue to define & document our own narratives — I’m starting in the pocket of this sweater (thanks, Beth, for the tip).

IMG_0102.jpg

Slow stitching inspiration, thinking about the role of thread and fiber in mark-making, heritage, and recording history in cloth.

There

Looking forward to this series interviewing slow fashion leaders

Honored to be included in this piece on slow fashion sourcing

One step at a time, times 3: to lead, to follow, to make a habit.

Other numerical comforts: take 5.

Finding hope in local: local knittinglocal elections, and learning how to be an active ally.

Plus: Ebony’s interview & illustration series

Fair Dare fabric recommendations

Fight!


An A-frame skirt, at long last

1-2016-12-19-14-58-12

Good things take time

is that an overused adage?

(You may remember, this skirt was first up to bat in my fall queue; it is also, apparently, the snail-paced slowest of slow fashion garments I think I’ve ever made — partially cut in May, tabled until September, resumed, dropped, and a grand finale in the final days of my ‘fall capsule’ – but who’s counting?)

4-2016-12-19 15.02.30.jpg

I honestly thought I would finish it by early October at the latest, but that didn’t happen, and then time seemed to hop skip & jump until late November. Post-election, hands-to-work-and-hearts-to-heaven & all, it brought me strength and comfort to work on this garment, which I came to view as a cumulative, collaborative effort of creative businesswomen who inspire me.

The fabric: grown by Sally Fox, an organic cotton in natural brown, raised in Northern California; made in Japan when the textile industry all but collapsed around her; imported many years later by Kristine Vejar and purchased by me from her shop, A Verb for Keeping Warm (available online here).

The pattern: designed by Taylor McVay of Blueprints for Sewing, who draws on architectural details for thematic, visionary patterns (and whose creative space in Western MA I am secretly incredibly envious of); available online here.

8-2016-12-19-15-26-12

Finally, in my own drafty little hall closet sewing space, I pieced together these amazing, origami-like pockets, emphasizing the “wrong side” of the fabric which shows a bit more of the natural brown hue of the cotton, then slowly the panels of the skirt. I finished all of the interior seams with bias tape made from scraps, and dutifully pressed and pinned it all to lay flat. I installed a lapped zipper, first by hand and then by machine, it’s not quite hidden but I don’t really care. (it’s this one, in glorious brass and organic cotton which has ruined me to all other zips). I basted the side seams and tweaked the fit twice (thrice? maybe.). Finally the waistband, a vintage button from my stash, and a hand-bound buttonhole as the sun set on holiday cookie baking.

It truly would have been a perfect piece for my fall capsule, when the weather allowed for bare legs but long sleeves; I even remember wishing it was just done already so I could wear it. But actually, it’s perfect for winter too. Maybe not negative-thirty-plus-wind-chill Minnesota polar vortex winter, but on your average frosty winter day, it’s sleek over a pair of tights and a perfect complement to slouchy sweater and pile of knitted accessories.

Exhibit A:

2-2016-12-19-14-58-47

Pattern notes: I did make a muslin, in a comparable-weight fabric (some sort of cotton canvas that came from a free bin), and I highly recommend that. I chose View A, the more “pencil skirt” shape, and I knew I wanted it to be a little more ‘penciled’ than the original. I marked that on my muslin and took a bit of width out by narrowing the side panels at the bottom. I also graded from a larger to a smaller size at the waist and hip, per my measurements, and in fitting the final skirt I let out the hip just a little bit more. I used a 6″ zipper instead of the recommended 9″ but have no problem getting the skirt up (I did the same on the muslin to test it), and I lengthened the skirt by following the lines all the way down to the largest size, but not beyond that. It falls just above the knee on me, instead of below, and I considered drafting a facing instead of folding up the hem to keep the length, but I actually think this is a touch more modern and better for bike riding.

It feels so good to finally have this skirt completed and in my closet rotation, a mark of the time spent to make it, by me and all the people in the supply chain prior.


Project planning for fall

10-2016-09-18-14-51-09

Back to my point about project planning: whether or not you actually want to make/use/live with a capsule wardrobe, the free Capsule planner can be a helpful tool to plan wardrobe addition. I’m going with a fall capsule wardrobe, but I think the foundation of taking stock of what I have, identifying what’s working & what’s not, thinking about weather and lifestyle and any needs for the upcoming season allows me to easily identify and prioritize pieces I want to add to my wardrobe, capsuled or not.

From my wardrobe planning process, I have a clear color palette, an idea of my favorite silhouettes, and an inventory of what I have and what gaps exist in my wardrobe. I have a good number of boxy tops that I love, but am pretty low on pants and skirts to pair them with (especially pieces that are in good condition and can be dressed up a bit).

The Capsule planner also offered a nice time to reflect on my goals: moving slowly, keeping my closet pared down, and working with my stash. So now, the part I daydream about the most! What to make? How will the things I make pair with what I already have and love?

Since I generally enjoy making most of my wardrobe, I use the shopping list part of the Un-fancy Capsule planner to think about what projects to prioritize. But, considering my current need for pants and the learning curve to make a pair (which I don’t have time for just yet), I decided to invest in a pair of Clyde pants after many many months of contemplation and budgeting. I also need another pair of shoes, ideally boots, which is a bigger budget item, so I’m trying to keep my project budget lean and finish up a few WIPs.

Roughly in order of priority:

1-fall-capsule

Loose inspirations & interpretations: 1 | 2 | 3 | 4 | 5 | 6

I wouldn’t say this planning method is totally foolproof — I could still end up with clothing that doesn’t quite fit or isn’t durable, or doesn’t ultimately move into regular wardrobe rotation. But I have a natural tendency (ok, borderline obsession) toward planning and I think laying it all out ahead of time is really helpful.

I also know that this fall — really, the rest of 2016 — will be very busy for me, and there’s a chance that I won’t get through even half of the items on my list. Through my summer capsule wardrobe experience, I learned that making one full garment per month is a reasonable pace, so with my fall planning I’m trying not to set my expectations too high, and by prioritizing, I can focus on each item in due course. Still, if I don’t get to making or finishing the items on my list, I know that I have plenty to wear and lots of great options in my fall capsule.

This is my current practice of balancing excitement, inspiration, and desire, with gratitude, responsibility, and time management. Do you have a fall list? I love learning about how others plan (or don’t!) their projects, and welcome your thoughts in the comments!

Marled sweater inspiration

1-marled sweater insp1

1 | 2 | 3 | 4

I’m in total agreement that the best prize of a knitalong is the resulting knitwear, however, I was totally floored to win a sweater’s worth of Brooklyn Tweed Shelter yarn as WIP of the Week.

And it’s funny, because when Brooklyn Tweed released the Shelter marled colorways, I was sketching out my Fringe & Friends KAL plans and part of me (ok, most of me) wanted to ditch the Shelter sweater that needed un-doing and re-using to get my hands on those beautiful neutrals.

So I’m still in disbelief that I get to both reuse the existing sweater’s worth of Shelter (a treasured gift to Jenn), and then I’ll get my own sweater’s worth of Shelter gifted to me. Crazy.

But what to knit?

My first thought for a Shelter sweater went to Bronwyn, which totally stole my heart when it was released, but I wonder if the texture would get lost or feel too overwhelming in a marl. I actually already have a marled, cabled sweater — my Ondawa (shown below) is in a very similar colorway to “Caribou” and I love it, so I think another camel marled sweater would be too similar. That leaves me deciding between “Newsprint” in black & white, and “Narwhal” in grey & white.

1-marled sweater insp-001

1 | 2 | 3

I love the contrast of Newsprint and I remembered Jen Beeman’s gorgeous self-designed Stone Lake marled sweater. Less cabled than Bronwyn, but it makes me think Bronwyn could look nice in the Narwhal colorway since it’s lower contrast.

But, while I love knitting within the natural “grey rainbow,” I feel like Newsprint would be a nice treat as a change of pace — something less common in the small farm yarns I usually gravitate toward. In fact, the other sweater quantity of yarn in my stash is a medium-dark grey from a local small farm & mill, purchased with Exeter in mind. Maybe the marl wants to be something simpler, a break from cabling…

BT newsprintvia

So then I thought about shape and style elements — what shape would best complement my existing sweaters? I have a simple, v-neck pullover that’s a hand-me-down from my dad, a men’s cashmere sweater that shrunk one too many times to fit him. It’s inky black and luxuriously soft, albeit moth-eaten with elbows that look like swiss cheese. I adore it.

Maybe a pullover with a nod to the soft, slouchy shape of this sweater I love? Immediately I thought of Lucinda, whose clever purl-side-out would certainly showcase the marl beautifully. My only hesitation is that Lucinda’s lovely drape and texture seems to come from yarns with a mixed composition, usually with a bit of silk.

Browsing some of the other Madder designs by Carrie Bostick Hoge, I remembered the newly-released Junegrass pullover, showcasing the gorgeous Colorado farm yarn Junegrass by Fancy Tiger Crafts, which includes one of my most favorite garment details: a split side seam.

Which leads me to my current daydream: a black & white marl Junegrass, with a neckline more like Lucinda (perhaps using my top-down customization skills learned in the knitalong), and a sleeve length slightly in between 3/4 and full sleeves (to match the feel of my well-worn and loved black pullover).


Summer capsule reflection

10by10 large

What I wore

Looking back, I had a few clear summer silhouettes:

  1. Sleeveless, boxy cropped shirt + high waist + sandals. In heavy rotation were my self-drafted crop top, my blue striped t-shirt, my knit beach tank, mixed and matched with my cut-off jean shorts, vintage linen wide-leg pants, thrifted high-waist non-stretch jeans, and paired with my Birkenstock sandals or Zuzii sandals (which I bought for a wedding and have proved quite versatile).
  2. Breezy dress with pockets + sandals or sneakers. For me, dresses are the easiest thing to wear in the summer, and can be styled a little differently (more casual or a more refined) depending on shoes or jewelry. My most-reached for this summer were my wabi-sabi Dress No. 1, my hacked V1482, and my Charlotte Kan tie dress (see below). I love me-made dresses because I can make sure the length is in my comfort zone, and I can always add pockets.
  3. Wide-legged jumpsuit (sometimes layered under a top) + sandals. For hot and sticky weather, and bike riding all over town, my two jumpsuits were perfect and fun: one is a vintage linen style that I bought on ebay and dyed in indigo, and the other is a black organic cotton Sallie jumpsuit that I made last summer.

And a quick shout-out to a couple of me-made favorites that were in heavy rotation but never got a full blog post: tops and dresses made from Charlotte Kan Pocket-T and Tie Dress patterns:

CK recap

From left: I first made the Tie Dress in a linen-cotton blend last summer as a birthday present to myself, and then I volunteered to pattern test the Pocket-T (so I received the pattern in exchange for my review; I used deadstock Cupro from Feral Childe) last July. Last fall I made a cropped version (with split side seams) of the pocket tee in Merchant & Mills Irish linen, and in the spring I used the sleeve shape and waistline to create a heavily modified V1482 (a.k.a. Rachel Comey sack dress). If you’re interested in more details on any of those, feel free to ask in the comments, or let me know if a full post would be helpful.

What I didn’t wear

This summer was non-stop heat and humidity at home, and really didn’t cool down in the evenings at all, as it does in other places I’ve lived. This meant that I rarely/never wore any of my warm layers (light sweaters or jackets) except for travel. I also hardly wore my stretch denim jeans or my Prism dress because long sleeves and pants just never seemed like something I wanted on my body. Since my summer capsule extended into early September, I was able (and excited!) to bring these items into the rotation at the very end of the time span.

I didn’t wear my black high-waisted shorts often, but I still love them so much. They’re just a little too short for riding my bike or workwear but they’re great for going out with friends or dates. I also pretty much never wore my wrap skirt! I need to make it a faux-wrap skirt because it always feels too fussy so I don’t reach for it.

1-collages3

What I made (and what I didn’t)

  1. Just before I officially committed to my summer capsule, I made a self-drafted crop top and it was easily a summer fave (also made one for a friend), worn alone or layered over a jumpsuit or dress.
  2. At the start of June I also finished knitting a lightweight shawl, which I intended to wear for my brother’s wedding but didn’t really end up needing. I think it will be great for fall and spring layering though.
  3. In June I made a rather wabi-sabi Dress No. 1, which exceeded my plans and expectations in how fun it was to make and wear (dressed up for a friend’s wedding, as well as my brother’s wedding rehearsal party, and dressed down for daily wear).
  4. In July I braved the unending humidity to draft and stitch my “Best Woman Dress” (full post coming soon! Inspiration post here)
  5. For a quick travel project and stash-buster, I knit a bright red Diode hat
  6. In August, I cast on a new sweater for my partner as part of the Fringe & Friends Knitalong.
  7. In the very first days of September I finished a set of silk Lakeside Pajamas

I had hoped and planned to draft and sew a tunic that I had envisioned when I received a beautiful piece of khadi from A Verb for Keeping Warm as a Me-Made-May contest prize (which I didn’t even realize I had entered!). I can see how the tunic would have fit into my capsule and silhouettes, but I didn’t necessarily feel that it was glaringly missing. I just didn’t have time, and I’m sure it will still be inspiring next spring/summer.

I also didn’t finish the Penny Raglan I had planned. I actually started making it, and it’s not too far from being finished, but I just don’t think I’ll wear it. I love the penny raglan shape but I made it out of a linen-cotton blend curtain I found at Goodwill, and it’s too sheer for my comfort level. I’m debating between tossing the unfinished garment in the scrap bin, or finishing it and giving it away.

Looking at this list, I essentially made one garment per month, with one smaller project added in or wrapped up. It’s really helpful for me to better understand my pace so I can be realistic with planning my projects and purchasing supplies, and it’s also nice to realize that I posted about nearly all the finished garments here.

This feels good as in the past I’ve been somewhat on the fence with blogging, but I’ve really been enjoying it as a writing outlet and a place to record notes (like this post, which has been a running draft for several weeks now) and inspiration. Sometimes I just don’t want to spend any of my free time on a computer (since my work involves a lot of screen time — that’s why my tactile hobbies are so nourishing for me), and other times I’d rather move into the next project instead of re-hashing what I finished, but I value the opportunity to appreciate each project and learning process.

10 x 10 outfits

What I learned, and notes for next year

My biggest takeaway is that I actually didn’t feel limited by my capsule wardrobe — I had plenty to wear, and even felt a bit more adventurous trying to experiment with new ways to wear what I already love.

Toward that end, I played with styling by trying a 10 x 10 challenge while on a 10 day trip, and it was really fun! I love layering and that can get tricky in the summer. Honestly, I have no issues with repeating outfits, but the 10 x 10 challenge to make 10 items feel like 10 different styles was really interesting and showed me that my clothes have greater versatility than the way I typically wear them. It also allowed me to pack a light carry-on and still dress appropriately for a few days at the beach, a wedding weekend, and a few days in New York City. I thought about doing a full post on it but then I fell behind (and subsequently gave up) photographing the 10 outfits. The items from my 10×10 experiment are featured in the collage at the top of this post, and the first two looks are shown above (travel day and beach day).

Part of what draws me to the capsule wardrobe exercise and using capsule planning to pare down my project list a bit, is that I get stressed out when I’m growing my stash by buying things I don’t have time to use or make. My summer capsule was successful in helping me hone in on a projects I really wanted/needed to make, and stick to working through my stash!

To be completely transparent, I did buy a few things during this capsule stretch, like the Lakeside Pajamas and Penny Raglan patterns. And when I visited Fancy Tiger Crafts I bought lots of underwear elastic, and two cuts of hemp knit for shirts for Jenn. But I didn’t buy any new fabric for my own wardrobe. And I fought a very intense urge to throw my plans (and budget) out the window to make a stripey Fen dress — that was a fascinating rollercoaster of desire to witness within myself, and might become its own post soon.

My summer capsule wardrobe also affirmed my love for jumpsuits: if I had to live with only one item of clothing, it would probably have been my indigo linen jumpsuit this summer (it’s a vintage Flax jumpsuit that I bought on Ebay and overdyed at home). I recently read an interesting post on the question of whether a love of styling is at odds with a minimalist approach to fashion, and the author brought up how garments that are versatile don’t have to be basic. For me, jumpsuits are a prime example. You know all those “wardrobe essentials” lists on Pinterest and in fashion magazines? They often include items I don’t own or rarely wear, like a classic blazer or pencil skirt, whereas because I love the jumpsuits I have, they’ve become essentials.

A few notes for next year’s warm season:

  • My Nisolo sandals are really a half-size too big, and wearing them in very wet grass for an evening didn’t help that. It might be wise to replace them.
  • I’m pretty good on lightweight sweaters — I have three that I love, which cover different shapes, and meet my needs for this climate.
  • I love my Zady linen tee but it shows wear more quickly than other items, so it would be a good item to duplicate. Either with another of the same – maybe in black or stripes so I don’t need to worry about staining so much, or I could knit a similar shape in Quince & Co. sparrow (I’m looking at you, Moon Tee).
  •  I think another shift dress in place of my Prism dress would be good, and especially one with pockets — I’m head over heels for Lily Schlosser’s Fen dress in stripes, so that might jump to the top of my spring/summer list for next year.

So there you have it – my first official capsule wardrobe and wrap-up. I plan to keep going with this pattern for a while because I’m enjoying it and I think it’s a valuable tool for my goal of a maintaining a small closet. What do you think — are you interested in a capsule wardrobe, would you try one? Do you plan your wardrobe and/or projects in other ways? Do you love having an expansive stash?

Fall style inspiration

1-fall insp

1 | 2 | 3 | 4 | 5

Layers

I know, shocking — fall inspiration & excitement over cool weather layering possibilities. After a hot and humid summer across most parts of the country, I think this is a daydream shared by many. I’m looking forward to the usual suspects in denim, linen, wool, tights, and boots, but perhaps some new proportions this fall & winter. A bit lagenlook, a bit ’90s nostalgia, a bit of exploration and play for a contemporary mix.

1-Starred Photos31

Beanies

Because I really miss wearing hats, and also just generally being wrapped in wool. I just finished knitting the bright red Diode hat (left), which was a seasonally inappropriate summer project but a satisfying travel knit and a terrific shape and fit. Coming out of storage will be my Lilian beanie (middle) and my Jul hat (right) which to be honest needs to be re-knit at a smaller gauge because I never swatched and it has grown a lot in size. For me, hand knit accessories are a great way to top off (pun intended!) a neutral outfit and wardrobe with bright colors, and it’s also much easier and less resource-intensive to dye a small item a bright hue than to tackle, say, a vibrant oversized sweater (for Diode I used madder extract, for Jul I used fresh coreopsis flowers).

avocado

Warm neutrals

My warm weather color palette skews more toward cool colors, lightwashed indigo and white. For fall, I’m looking forward to drifting back to neutrals and a bit of warmth: grays, darker blues and black, rich browns, and apparently, I’m very drawn to that peachy nude (in inspiration images 1, 2, and 5 above). At first I thought I have nothing in that color in my stash or closet, but then I remembered the bag of avocado pits in my freezer… maybe a cool weather dye project will make that happen. (My previous avocado pit and iron dye experiments shown above).

p.s. I haven’t written off the end of summer — in real life, where it’s perfect bike riding weather, or in terms of writing here — and still plan to post about my best woman dress and reflect on my summer capsule in the coming weeks.

Sweater for love, redux: Fringe & Friends KAL 2016

alternate title: when you hardly love what you knit for someone you love

IMG_8915

It was a disappointment, the Sawyer sweater. Despite 2 gauge swatches, measurements of both body and well-fitting garments, blocking with care, and seaming – ugh, the seaming (shoulders abutting set-in sleeves and a two-piece placket meeting a ribbed collar), it was such a flop.

It was like the sweater embodiment of a shrug.

Not for lack of effort, on my part (did you read about the seaming? And my perseverance?), and maybe even moreso on hers. She lit up when I snipped off the final yarn tail, eagerly tried on the sweater that was promised many months before, and insisted that it was great – cozy, even.

But all I could see were the shoulders sagging off, the sleeves way too wide and long, the whole thing just looking like the wilting leaves of my favorite plant when I forget to water it, and then a flicker of that self-critical disappointment when garment and body proportions don’t quite match. So of course I wanted to bring it back to life. Just take in the shoulders a bit here, re-knit the sleeves so they stop right there, maybe block it into submission.

The thing is, I just didn’t want to. When I thought about re-knitting even one sleeve and suturing it back into the shoulder to cover up the ill-fitting armhole, felt wilted, shrugging, unwilling.

Naturally I knit a few smaller things from my queue for myself while I thought about how to rectify the sweater situation. I want to be able to share the joy and love that I feel when making and wearing my own handmade clothes with those I love. I want my partner to love the sweater not only because I made it for her but because she loves the way it feels, the way it keeps her warm, the way it fits her body and her style. And of course, I want to love the sweater every time she wears it.

Is that such a tall order?

IMG_8904

(maybe.)

(yes, probably; then again, have you heard about how clothes have shape-shifting, mind-bending emotional powers? I digress.)

But possibly the most frustrating, wilt-inducing thing about sweater v. 1 is that I know I can get so much closer. I really think it could only go up from here. I think if I were sewing I could measure the muslin to determine a more precise fit, re-cut the shoulder line, take a few notes, rip out a seam, and get it into much more lovable shape.

And here’s where it hit me: the top-down sweater. These same things, in addition to a totally clean slate and creative freedom, can be achieved with a top-down raglan sleeve sweater. Karen Templer has been singing the praises of this method since I started following her blog, Fringe Association, but I still didn’t really believe it, or possibly I just didn’t comprehend the process.

When I read the Fringe & Friends KAL 2016 prompt – an invitation, really – I thought too bad everything in my stash is already earmarked for other sweaters. (once again, mostly oblivious to the promises I’ve made to make things for others. oops.) But then, while having fun drawing out some sewing projects, I was thinking about how empowering self-drafting is — so satisfying to get the fit you want, without any labels telling you where your size ranks, whether you have a full this or a sway that.

And I swear, from my yarn basket on top of the cabinet in the corner of my sewing “studio,” the half-unraveled Sawyer sweater beamed out some sort of morse code: top. down. raglan.

IMG_8910

So here I go again, sweater of love for my love, v. 2, with all the things we want and none of what we don’t: knit from the top down, with a crew neck and henley placket, raglan sleeves with just-right armhole depth, plain stockinette fabric to let the heathered yarn shine, and sleeves and hem sized to fit.

There will be no shrugging.

Capsule planning as project planning

IMG_0081As makers, we can have total freedom over what clothing to create and wear. But do you ever feel like:

  • It’s a fine (and sometimes frustrating) line between fabrics, patterns, and projects you love the look of vs. fabrics, patterns, and projects you love to wear 

— and/ or —

  • There are so many good sewing projects out there, or waiting in your stash, that you can’t just pick one to start, and you end up not making anything! (decision paralysis)

These are common challenges for me, and conversations I see popping up on social media, and I think it comes back to planning. If, like me, you enjoy planning out your makes and are looking for tools and tips to help with that process and help align your projects with your stash and your style, then may I introduce you to: the Capsule planner.

I think the beauty of the planner is that the steps aren’t revolutionary — the same type of steps that you’ll see in the Wardrobe Architect series or the Into Mind workbook, but instead of months and chapters of planning, it’s super concise. (I completed it in just two short sessions, over breakfast before work). I love planning projects but I can easily get stuck daydreaming and sketching, or conversely overwhelmed by all the great pairings of stash materials + patterns + shapes I’d like to wear. This capsule planner by the blog Un-fancy provides helpful guidelines and keeps the process confined, so you can move onto wearing (and making!) your capsule. The basic steps are:

  • Define your timeline (a season, a few months, even a specific travel period)
  • Assess your climate & lifestyle needs over this timeline
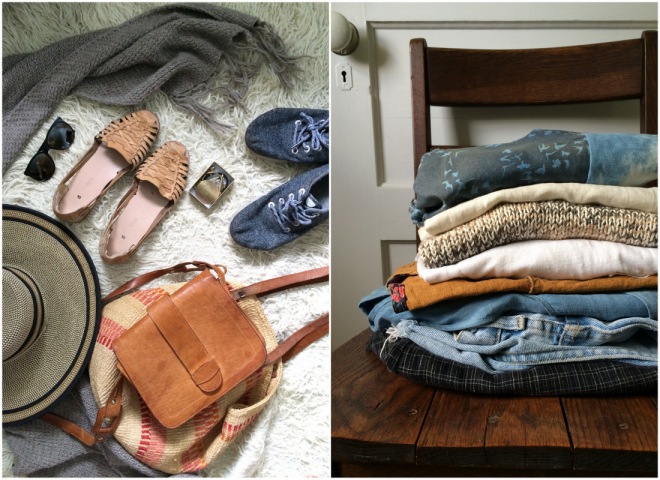
  • Pick out your 8 favorite pieces for this type of weather & lifestyle, and also note what pieces you haven’t been reaching out
  • Use those lists to brainstorm what’s working for you and what’s not, in terms of color, material, fit, etc.
  • Use the above exercises to inform a color palette, shopping plan, and budget

If you’re looking for more in-depth exploration to help identify your personal style, I think a more involved planner would be really beneficial. But if you’re looking to try a capsule wardrobe, or just find some peace in planning out what to make or buy, I’d recommend this one. (it’s free!)

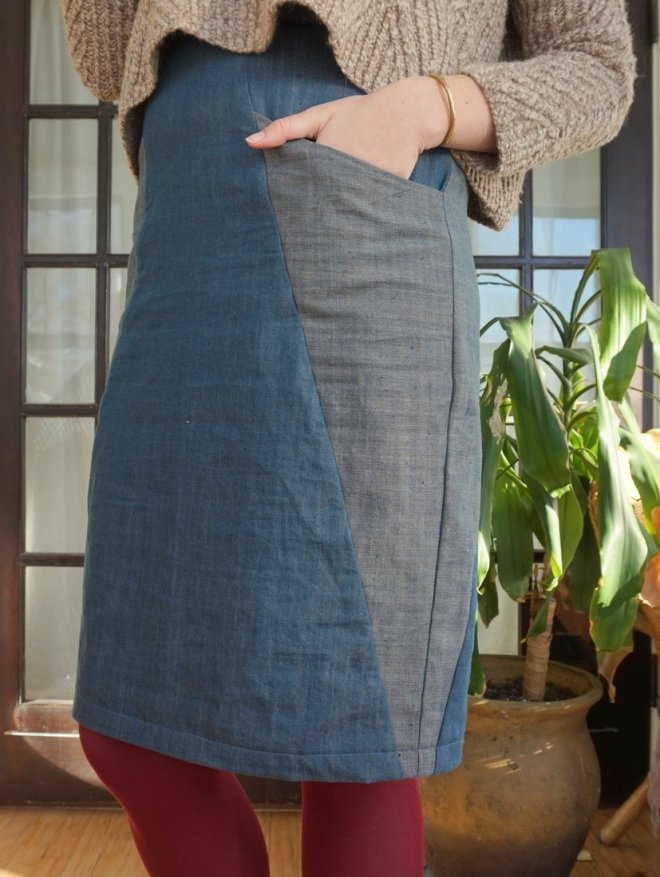
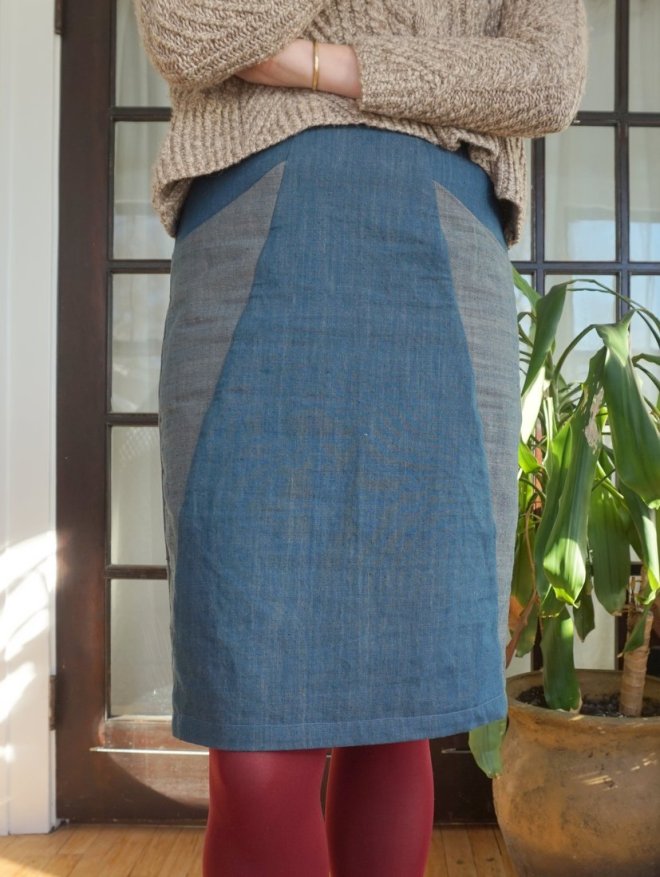
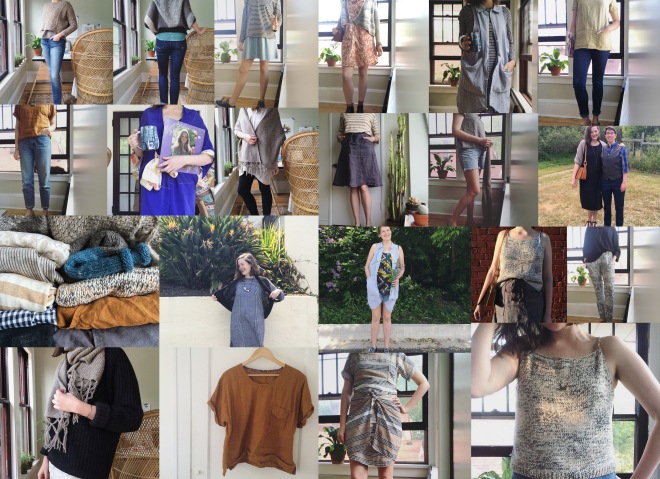
The thing is, whether or not you plan on “capsule-ing” your closet, you could use this guide to make your sewing, knitting, or shopping more considered, and ultimately, I think (I hope!) make your closet more satisfactory. As I went through the planner for my summer closet, I came up with a few quick tips for adapting the capsule wardrobe planner for a handmade, me-made wardrobe:

IMG_0085

Use it (re)assess your stash

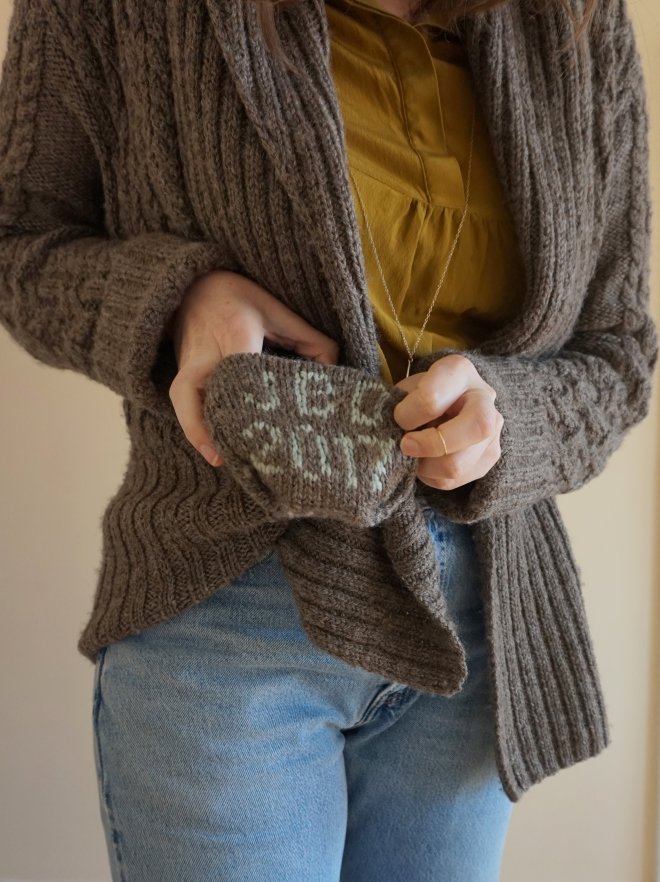
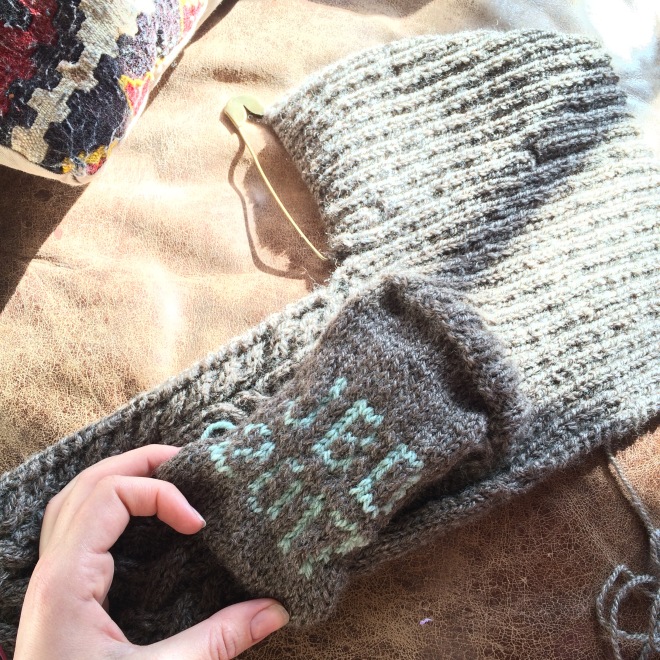
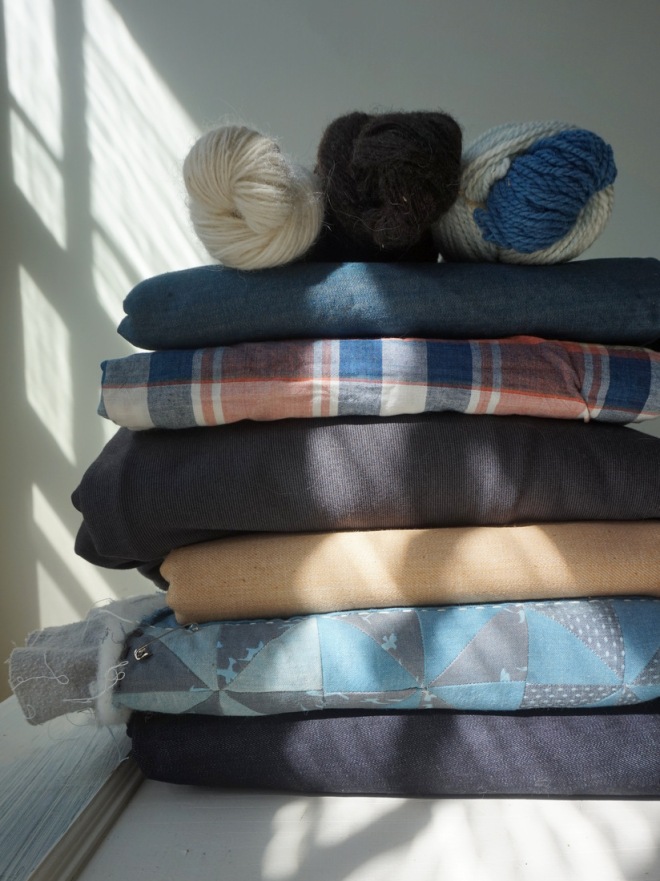
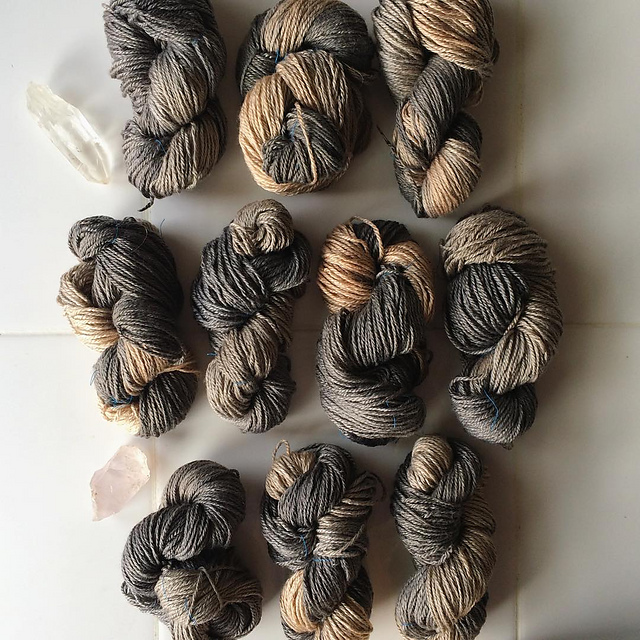
Writing out some style parameters, a color palette, and “what’s working” or not working for me, immediately made me think of my stash. How well does my stash (both fabric and yarn) reflect what I want to wear, or need to wear to suit this season? I actually took swatches from my stash and scrap bin to make my color palette, and then I also wrote down some natural dyes that fit my palette so that I have options in mind for modifying things in my stash or secondhand fabrics I come across. For example, I love the vibrancy of cochineal pink, but when I look around at my favorite things to wear (and the resulting color palette), cochineal pink really doesn’t go. But the blush pink and peach of avocado pits complements my palette, which centers around un-dyed cream/white, indigo, warm browns from cutch and pomegranate, and the range of grays from tannins + iron.

Personally I’m at a point where I feel uncomfortable at the thought of my stash growing any larger. Even though I’m focused on summer sewing, the capsule planning process (and more broadly, my efforts to keep a small closet) has helped me part with some fabrics that weren’t going to see the light of the project table any time soon. If you’re looking to de-stash, this planning process could be a great place to start!

1-2016-07-04

Use it to become a better maker

I’m pretty aware of my favorite pieces of clothing and could write down my “top 8” with little hesitation. But the “never wear” section? I blanked. I changed it to “rarely wear,” since things that are truly unworn are probably sitting in the scrap pile or someone else’s closet at this point, but when I took a hard look at my closet I realized that the things I’m reaching for the least are handmade pieces from my early days of sewing. The common themes are ill fitting and poor finishing, which I realized could not only free up space in my closet but could serve as valuable feedback to become a better maker. As I sew this summer, I’m using these “rarely worn” pieces as a good reminder that I need to make muslins or double-check measurements, and not skimp on seam finishes.

IMG_0082

Use it to prioritize your projects — both new makes and mending

For sure, I still get the urge to make all the things, but as I planned my activities & special events over the next three months, it seemed like such a busy time! So I used the shopping list as an abbreviated “making list”: I know that I have to prioritize making a dress to wear in a wedding, and then I picked 3 other items to make that will fit in my capsule. Of course, I have longer term projects like my One Year One Outfit pieces and my Tamarack Jacket, but I’ll keep those moving slowly ahead when I have time, or after I finish my priority items.

The “rarely wear” section also becomes a good “at a glance” list of what to mend, alter, upcycle, or dye — which for me is a good way to keep on sewing or knitting while not going overboard on the number of items in my capsule/closet.

IMG_0087

Use it to inpsire & budget for styling your makes & building skills

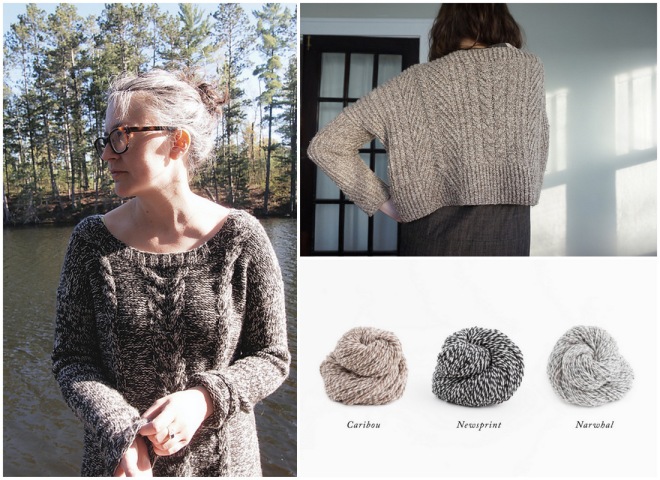
For me, the “brands” and “budget” section of the capsule planner seemed almost irrelevant at first. Of course, you can list your favorite pattern designers as your go-to brands (I did), but then I realized that brands can reveal more than a shopping list — an aesthetic wishlist. So I listed some of the brands I admired and thought about some of the reasons why I like their designs: high quality natural fibers, simple and timeless shapes, the color palette, the styling — all inspiration for my summer makes. (See more on my “sewing inspiration” pin board, if you’re curious).

And since I’m committed to using my stash, I don’t need to budget for new materials, but I realized there were a few special items and experiences I wanted to add. Going through the events, travel, and activities balance for summer really helped me crystallize this list. The big one for me is that my brother is getting married (in just a few weeks!) and while I plan to make a dress for myself, I want to complete my look with a (rather overdue) hair cut and a new pair of sandals, and if there’s room in my budget then I’ll spring for a pedicure and some makeup too (I have a running wish list of non-toxic options, but would love any suggestions if you have favorites!).

With summer travel and special events, my budget is pretty full, but in the future I think the budgeting section will also be a great place to incorporate classes and skill-building. I’ve been investing in textiles classes (most recently, weaving) and natural dye books and materials for the past year, and the cost can definitely add up. But framing them in the context of the span of a season, and in lieu of shopping, could be a great aid in allocating those funds.

So those are the modifications that came to mind for using capsule planning as a vehicle for planning all my sewing, knitting and dyeing projects. Of course, it’s my first time “officially” planning a capsule wardrobe, so I’d love to know if you have experience with this type of exercise — any and all suggestions are welcome!

Me Made May 2016

1-2016-06-05

Things learned from (nearly) daily documentation of my handmade (by me) wardrobe:

  1. Lighting is everything. Bright, indirect lighting is the key to top-notch (amateur) photos.
  2. Windowsills and yoga mats make great tripod substitutes 😉
  3. My patience wears thin after about 4 self-timer photos
  4. Cropping out your face makes the photo selection process easier (fewer goofy expressions!)
  5. The online #memademay and/or maker community is really kind, chatty, and encouraging
  6. Posting a photo of yourself every day can be a really affirming ritual, and a good motivation to be a little more put-together
  7. But if you don’t feel like photographing yourself, capturing a still life nearby can help you slow down and appreciate the details
  8. Documenting everyday outfits, routines, and “me-mades” elucidates patterns – circling back to the Wardrobe Architect project which I never really finished, I can scroll through my Instagram feed and see what proportions, color palette, and styling I gravitate toward, and use this to inform future projects

On Selfies

I won’t lie, I felt rather self-indulgent posting a photo of myself nearly every day on Instagram for Me Made May 2016 – who am I, a #ootd fashion blogger?! I think this stems from my self consciousness to not be that millennial, but I really appreciate seeing how garment patterns look on people in the sewing and knitting communityand getting a glimpse at how people style their “me mades” and I like sharing and contributing to that too.

You can find details of what I wore throughout May on the corresponding Instagram photos.

On Digital Community

Posting  Me Made May photos this year was a really fulfilling way for me to feel connected to the sewist/maker community. Working from home can be a bit of a roller coaster, where some days are quiet and self-directed, and some are action-packed with conference calls, meetings, and errands. Sometimes I’ll go to a coffee shop to get outside my home office and feel motivated by the energy there, and I just joined a co-working cooperative for a part-time office space. While I generally enjoy the peace and focus that working in an office of one (plus two cats) offers, it can also get lonely. Chatting with people on Instagram, especially people who share my interest in making and mending clothing, provides community on days when I’m alone at my desk.

IMG_4937

In addition to flying solo, working from home can definitely impact your style. Working in my pajamas does NOT work for me – I really need the mental/emotional separation of getting dressed, sitting down at my workspace, and oddly, wearing shoes, to be focused and productive. And yet, while I certainly get dressed everyday, working at home has lowered the bar on what I wear every day. It’s nice not to have to get too put-together before starting my day, but it can also get kind of lackluster, so documenting my daily outfits and the me-made components definitely helped me revive my everyday effort. And since this was a busy and quite productive month for me work-wise, I’d say that effort carried over into my attitude and energy!

Do you work from home, or otherwise self-direct your days? I love the way Allie has been documenting the outfits and effects of everyday style for “My Handmade Month” over on Indie Sew.

On Capsuling

Funnily enough, just like last May, this month involved significant travel and necessitated a compact, versatile wardrobe. Jenn and I spent 10 days in California to celebrate a wedding (in “dressy casual” attire), camped in a tent for two nights at the wedding site, and then had a jam-packed week of catching up with Bay Area friends, family, and co-workers.

IMG_5708

As I’ve noted before, I think traveling provides a great impetus to try the “capsule wardrobe” framework and plan an efficient and stylish wardrobe. As I packed up my suitcase to head home, I felt really satisfied with the versatility and comfort of what I packed and wore, and it was just the reassurance I needed to commit full-on to a “capsule wardrobe” mindset and closet re-set. More details on that coming soon!

p.s. Remember how I was going on about mustering up more political engagement in addition to personal projects? One exciting option, if you’re so inclined, is this petition to support industrial hemp cultivation in the US.