Indigo tamarack: part IV

Indigo Tamarack 1.jpg

All the while making this jacket, I thought to myself: this will either look crazy, or crazy good.

As I rounded the home stretch of binding the jacket edges, I knew that the latter was confirmed. Introducing my indigo Tamarack jacket: hand-dyed, patchwork-pieced, hand-quilted, lined in upcycled flannel, filled with locally made wool batting, bound by hand, a supremely cozy feat of skill-building slow fashion.

Indigo Tamarack 3.jpg

It just feels so good — crazy good — to finally wear something that has been growing and evolving, stretching and reflecting over a year of creativity. In a way, this jacket charts my trajectory in style and skill, explorations and impulses. In a way, it’s less a statement jacket and more a summary.

In nearly any incarnation, the Tamarack Jacket pattern by Grainline Studio seems like the perfect transition-season outerwear. For mine, I lengthened the body by 1″ and the sleeves by 2″, my standard adjustments, and the fit is perfect for lightweight layering. It’s a little crowded with my Exeter cardigan underneath, but just right over a fingering-weight sweater or simple sweatshirt (may I suggest: Liv light or Linden). It doesn’t yet have any form of closure, though I plan to add a few hooks & eyes, which I’m waiting to see if I can find at a textile recycling event later this month, and the updated version of the pattern includes a delightful looking snap option.

Indigo Tamarack 4.jpg

Should you choose to make a Tamarack Jacket in pre-quilted fabric, or perhaps a vintage quilt (yes, please do that!), you could probably have one in a day. Should you go for custom machine-quilting, you can probably still finish it in a weekend. Should you wish to make an indigo vat, cut apart and patchwork together your pieces, source your batting locally, quilt it together with sashiko thread, bind all the interior seams, finish the exterior binding by hand, and embroider your heart into painstaking welt pockets — well, it might just take you a year and a half.

And it might be a crazy-neverending WIP, but the payoff might just match the persistence.

Indigo Tamarack 2.jpg

Worn with: vintage silk tee & jeans, handmade shawl, favorite necklace & clogs.

Project planning for fall

10-2016-09-18-14-51-09

Back to my point about project planning: whether or not you actually want to make/use/live with a capsule wardrobe, the free Capsule planner can be a helpful tool to plan wardrobe addition. I’m going with a fall capsule wardrobe, but I think the foundation of taking stock of what I have, identifying what’s working & what’s not, thinking about weather and lifestyle and any needs for the upcoming season allows me to easily identify and prioritize pieces I want to add to my wardrobe, capsuled or not.

From my wardrobe planning process, I have a clear color palette, an idea of my favorite silhouettes, and an inventory of what I have and what gaps exist in my wardrobe. I have a good number of boxy tops that I love, but am pretty low on pants and skirts to pair them with (especially pieces that are in good condition and can be dressed up a bit).

The Capsule planner also offered a nice time to reflect on my goals: moving slowly, keeping my closet pared down, and working with my stash. So now, the part I daydream about the most! What to make? How will the things I make pair with what I already have and love?

Since I generally enjoy making most of my wardrobe, I use the shopping list part of the Un-fancy Capsule planner to think about what projects to prioritize. But, considering my current need for pants and the learning curve to make a pair (which I don’t have time for just yet), I decided to invest in a pair of Clyde pants after many many months of contemplation and budgeting. I also need another pair of shoes, ideally boots, which is a bigger budget item, so I’m trying to keep my project budget lean and finish up a few WIPs.

Roughly in order of priority:

1-fall-capsule

Loose inspirations & interpretations: 1 | 2 | 3 | 4 | 5 | 6

I wouldn’t say this planning method is totally foolproof — I could still end up with clothing that doesn’t quite fit or isn’t durable, or doesn’t ultimately move into regular wardrobe rotation. But I have a natural tendency (ok, borderline obsession) toward planning and I think laying it all out ahead of time is really helpful.

I also know that this fall — really, the rest of 2016 — will be very busy for me, and there’s a chance that I won’t get through even half of the items on my list. Through my summer capsule wardrobe experience, I learned that making one full garment per month is a reasonable pace, so with my fall planning I’m trying not to set my expectations too high, and by prioritizing, I can focus on each item in due course. Still, if I don’t get to making or finishing the items on my list, I know that I have plenty to wear and lots of great options in my fall capsule.

This is my current practice of balancing excitement, inspiration, and desire, with gratitude, responsibility, and time management. Do you have a fall list? I love learning about how others plan (or don’t!) their projects, and welcome your thoughts in the comments!

Summer capsule reflection

10by10 large

What I wore

Looking back, I had a few clear summer silhouettes:

  1. Sleeveless, boxy cropped shirt + high waist + sandals. In heavy rotation were my self-drafted crop top, my blue striped t-shirt, my knit beach tank, mixed and matched with my cut-off jean shorts, vintage linen wide-leg pants, thrifted high-waist non-stretch jeans, and paired with my Birkenstock sandals or Zuzii sandals (which I bought for a wedding and have proved quite versatile).
  2. Breezy dress with pockets + sandals or sneakers. For me, dresses are the easiest thing to wear in the summer, and can be styled a little differently (more casual or a more refined) depending on shoes or jewelry. My most-reached for this summer were my wabi-sabi Dress No. 1, my hacked V1482, and my Charlotte Kan tie dress (see below). I love me-made dresses because I can make sure the length is in my comfort zone, and I can always add pockets.
  3. Wide-legged jumpsuit (sometimes layered under a top) + sandals. For hot and sticky weather, and bike riding all over town, my two jumpsuits were perfect and fun: one is a vintage linen style that I bought on ebay and dyed in indigo, and the other is a black organic cotton Sallie jumpsuit that I made last summer.

And a quick shout-out to a couple of me-made favorites that were in heavy rotation but never got a full blog post: tops and dresses made from Charlotte Kan Pocket-T and Tie Dress patterns:

CK recap

From left: I first made the Tie Dress in a linen-cotton blend last summer as a birthday present to myself, and then I volunteered to pattern test the Pocket-T (so I received the pattern in exchange for my review; I used deadstock Cupro from Feral Childe) last July. Last fall I made a cropped version (with split side seams) of the pocket tee in Merchant & Mills Irish linen, and in the spring I used the sleeve shape and waistline to create a heavily modified V1482 (a.k.a. Rachel Comey sack dress). If you’re interested in more details on any of those, feel free to ask in the comments, or let me know if a full post would be helpful.

What I didn’t wear

This summer was non-stop heat and humidity at home, and really didn’t cool down in the evenings at all, as it does in other places I’ve lived. This meant that I rarely/never wore any of my warm layers (light sweaters or jackets) except for travel. I also hardly wore my stretch denim jeans or my Prism dress because long sleeves and pants just never seemed like something I wanted on my body. Since my summer capsule extended into early September, I was able (and excited!) to bring these items into the rotation at the very end of the time span.

I didn’t wear my black high-waisted shorts often, but I still love them so much. They’re just a little too short for riding my bike or workwear but they’re great for going out with friends or dates. I also pretty much never wore my wrap skirt! I need to make it a faux-wrap skirt because it always feels too fussy so I don’t reach for it.

1-collages3

What I made (and what I didn’t)

  1. Just before I officially committed to my summer capsule, I made a self-drafted crop top and it was easily a summer fave (also made one for a friend), worn alone or layered over a jumpsuit or dress.
  2. At the start of June I also finished knitting a lightweight shawl, which I intended to wear for my brother’s wedding but didn’t really end up needing. I think it will be great for fall and spring layering though.
  3. In June I made a rather wabi-sabi Dress No. 1, which exceeded my plans and expectations in how fun it was to make and wear (dressed up for a friend’s wedding, as well as my brother’s wedding rehearsal party, and dressed down for daily wear).
  4. In July I braved the unending humidity to draft and stitch my “Best Woman Dress” (full post coming soon! Inspiration post here)
  5. For a quick travel project and stash-buster, I knit a bright red Diode hat
  6. In August, I cast on a new sweater for my partner as part of the Fringe & Friends Knitalong.
  7. In the very first days of September I finished a set of silk Lakeside Pajamas

I had hoped and planned to draft and sew a tunic that I had envisioned when I received a beautiful piece of khadi from A Verb for Keeping Warm as a Me-Made-May contest prize (which I didn’t even realize I had entered!). I can see how the tunic would have fit into my capsule and silhouettes, but I didn’t necessarily feel that it was glaringly missing. I just didn’t have time, and I’m sure it will still be inspiring next spring/summer.

I also didn’t finish the Penny Raglan I had planned. I actually started making it, and it’s not too far from being finished, but I just don’t think I’ll wear it. I love the penny raglan shape but I made it out of a linen-cotton blend curtain I found at Goodwill, and it’s too sheer for my comfort level. I’m debating between tossing the unfinished garment in the scrap bin, or finishing it and giving it away.

Looking at this list, I essentially made one garment per month, with one smaller project added in or wrapped up. It’s really helpful for me to better understand my pace so I can be realistic with planning my projects and purchasing supplies, and it’s also nice to realize that I posted about nearly all the finished garments here.

This feels good as in the past I’ve been somewhat on the fence with blogging, but I’ve really been enjoying it as a writing outlet and a place to record notes (like this post, which has been a running draft for several weeks now) and inspiration. Sometimes I just don’t want to spend any of my free time on a computer (since my work involves a lot of screen time — that’s why my tactile hobbies are so nourishing for me), and other times I’d rather move into the next project instead of re-hashing what I finished, but I value the opportunity to appreciate each project and learning process.

10 x 10 outfits

What I learned, and notes for next year

My biggest takeaway is that I actually didn’t feel limited by my capsule wardrobe — I had plenty to wear, and even felt a bit more adventurous trying to experiment with new ways to wear what I already love.

Toward that end, I played with styling by trying a 10 x 10 challenge while on a 10 day trip, and it was really fun! I love layering and that can get tricky in the summer. Honestly, I have no issues with repeating outfits, but the 10 x 10 challenge to make 10 items feel like 10 different styles was really interesting and showed me that my clothes have greater versatility than the way I typically wear them. It also allowed me to pack a light carry-on and still dress appropriately for a few days at the beach, a wedding weekend, and a few days in New York City. I thought about doing a full post on it but then I fell behind (and subsequently gave up) photographing the 10 outfits. The items from my 10×10 experiment are featured in the collage at the top of this post, and the first two looks are shown above (travel day and beach day).

Part of what draws me to the capsule wardrobe exercise and using capsule planning to pare down my project list a bit, is that I get stressed out when I’m growing my stash by buying things I don’t have time to use or make. My summer capsule was successful in helping me hone in on a projects I really wanted/needed to make, and stick to working through my stash!

To be completely transparent, I did buy a few things during this capsule stretch, like the Lakeside Pajamas and Penny Raglan patterns. And when I visited Fancy Tiger Crafts I bought lots of underwear elastic, and two cuts of hemp knit for shirts for Jenn. But I didn’t buy any new fabric for my own wardrobe. And I fought a very intense urge to throw my plans (and budget) out the window to make a stripey Fen dress — that was a fascinating rollercoaster of desire to witness within myself, and might become its own post soon.

My summer capsule wardrobe also affirmed my love for jumpsuits: if I had to live with only one item of clothing, it would probably have been my indigo linen jumpsuit this summer (it’s a vintage Flax jumpsuit that I bought on Ebay and overdyed at home). I recently read an interesting post on the question of whether a love of styling is at odds with a minimalist approach to fashion, and the author brought up how garments that are versatile don’t have to be basic. For me, jumpsuits are a prime example. You know all those “wardrobe essentials” lists on Pinterest and in fashion magazines? They often include items I don’t own or rarely wear, like a classic blazer or pencil skirt, whereas because I love the jumpsuits I have, they’ve become essentials.

A few notes for next year’s warm season:

  • My Nisolo sandals are really a half-size too big, and wearing them in very wet grass for an evening didn’t help that. It might be wise to replace them.
  • I’m pretty good on lightweight sweaters — I have three that I love, which cover different shapes, and meet my needs for this climate.
  • I love my Zady linen tee but it shows wear more quickly than other items, so it would be a good item to duplicate. Either with another of the same – maybe in black or stripes so I don’t need to worry about staining so much, or I could knit a similar shape in Quince & Co. sparrow (I’m looking at you, Moon Tee).
  •  I think another shift dress in place of my Prism dress would be good, and especially one with pockets — I’m head over heels for Lily Schlosser’s Fen dress in stripes, so that might jump to the top of my spring/summer list for next year.

So there you have it – my first official capsule wardrobe and wrap-up. I plan to keep going with this pattern for a while because I’m enjoying it and I think it’s a valuable tool for my goal of a maintaining a small closet. What do you think — are you interested in a capsule wardrobe, would you try one? Do you plan your wardrobe and/or projects in other ways? Do you love having an expansive stash?

Upcycled silk lakeside pajamas

img_9485

A slinky, breezy pajama set – or – a slice of humble pie.

What do I mean?

That I am both grateful to have these lakeside pajamas to wear on muggy nights and perhaps more grateful to no longer have them on my sewing table.

That even though I’ve been sewing most of my wardrobe for nearly 3 years and was starting to think my topstitching and bias binding skills were halfway decent, there is still so much to learn and practice.

Ok, what I really mean is that these pj’s are what my dad would call a “ten footer” project — they look great from 10 ft. away, but upon closer inspection the stitching is what I would call a hot mess.

IMG_9487.jpg

No matter, they’re still wearable. And at some point after wrestling with approximately twenty-six feet of bias binding to complete the tank top and first step of the shorts construction (an exaggeration, but still), I gave in to the struggle and decided that thread matching isn’t always necessary. Which, maybe, is a lesson in going easy on yourself, especially when it’s 9 pm on a holiday spent working the same as any other day.

Also when the color blocking would have made thread-matching a particularly time-consuming challenge. But the color blocking itself is a fun detail that was surprisingly easy since I was working with an already color-blocked silk skirt and shirt combo, picked up from a tag sale several years ago. I’m not the best at identifying silk fabric types, but I think this would be classified as a lightweight china silk — plain woven, no backing, some sheen.

img_8834

Whatever it is, remind me not to attempt to work with it anytime soon. Whereas my upcycled Alamada robe is a fluid, drapey silk, and my best woman dress is a mid- to heavy-weight stretch silk (which I only discovered while testing my stitches – more on that another day), this was a flimsy, slippery little devil that seemed to prefer to skew to the bias, and did not want to stay in a straight line under my needle.

img_8843

But the pattern itself, even with all the bias binding, is a gem. I love the overall look, with the slightly retro gym shorts and flattering a-line tank. The clever layered back pieces of the tank offer a breezy vent for hot nights without being too revealing, which I love; the shorts, however, are super revealing and would definitely not make it outside the house even if the stitching were better. But then, I knew when I was cutting that I would probably want to lengthen the inseam, but I chose not to because I was fussy-cutting to arrange the pieces on the various color-blocked portions available.

IMG_9491.jpg

Fitwise, I find both the upper-bust of the tank and the low hip of the shorts to be a little tight on me. I cut my usual Grainline size 10, although my hip measurement actually matches an 8 — I think the slight tautness might be due to the fabric, which doesn’t have much give. It could also be due to the french seams I was determined to use but not so dedicated to measuring properly. But after one night wearing them, they loosened a bit and are perfectly comfortable. Next time, I would lengthen the inseam of the shorts, remove the length I added (on a total whim) to the straps, and add a little room to the upper bust.

Just as having a fancy, handmade silk robe feels like a treat, having a stylish, matching pajama set feels surprisingly delightful. I can already imagine that next summer I might want to make an alternate set, this time in a light linen or organic cotton voile, with more precise stitching and a few fitting tweaks.

img_9492

Indigo Tamarack: Part III

IMG_0075

Fear not, my tamarack jacket is alive!

Remember when I bought the pattern as soon as it came out, dyed the fabric with indigo, sourced locally made wool batting, and even tested my quilting methods, then tabled it for six months and then wrote about how I really ought to prioritize it my queue?

Well it’s been the slowest of slow fashion, but the thing is, I didn’t really like how the quilting was looking. I went so far as to start machine quilting the back piece of the jacket, and though the stitches were even and I basted it and used a walking foot, the batting was so lofty and my quilting so amateur that the edges of the piece no longer aligned. I knew that if I continued I would hardly have a jacket the same size as the one I cut out.

I put my tamarack jacket in time out.

In the intervening months I had so many ideas for how to shift directions — minimalist sashiko hand quilting that would match the color of the jacket for a subtle tone-on-tone look; maximalist sashiko hand quilting that would celebrate the dashing white stitches in geometric patterns; machine quilting with narrow stripes to tamp down the loftiness; hand quilting with wide stripes to embrace the puffiness, etc. etc. as the Pin-spiration grew.

Inspiration 1, 2, 3, 4

I settled on a plan to make the quilting easier by reducing the loft of the batting by carefully “peeling” half of each piece off. To compensate for the lost insulation, I decided to switch from the lining I had cut from scraps to a lining cut from a thrifted flannel sheet. But still, I was uncertain of how to quilt the jacket.

And then, the Secret Catalog arrived and Maria’s OKONION x Secret Catalog quilts gave me ALL the heart eyes. (I know, emoji-speak, but seriously, check the quilts):

okonion quilt 1

Suddenly, all I wanted to do was quilt and all those months of Tamarack indecision evaporated as I decided I would jump into some quilt piecing. Since I had decided to remove the indigo-dyed scrap lining, I now had a set of coordinating fabric I could cut up and piece together. The last time I tried to quilt was in middle school and I chose turquoise and bright purple fat quarter sets from the local big box fabric store, and I think it was just a simple square repeat but the process lasted longer than my love for the color palette so I never finished it. (sorry mom, I still so appreciate your help).

I’m a big fan of Purl Soho’s blog, so I figured their classic aesthetic and generous tutorials wouldn’t lead me astray. The denim pinwheels pattern caught my eye quickly and seemed like a perfect match, so I trusted my gut and started cutting some test squares.

testing pinwheels

I followed the Purl Soho instructions but decided on 4″ pinwheels and adjusted the math accordingly (with 1/4″ seam allowances for the pinwheel piecing). Quilting the whole jacket seemed overly ambitious, and less wearable for my style, so I decided on quilted panels and calculated how many pinwheels I would need to fill the panels.

I think it took me about 2 evenings of chain piecing, cutting, pressing, and more piecing to assemble all the pinwheel blocks, and then another evening to arrange them into panels. I didn’t get too fussy with the arrangement, I want it to be random but avoid repeats next to one another (there are 4 fabric types and 6 pinwheel combinations).

pinwheel pieces rectangle

Attaching the panels to the (already cut out) Tamarack pieces was still a little nerve wracking since it felt like the point of no return, but I finally did that and am moving ahead with quilting! While sashiko quilting will make the jacket even more eclectic, I’ve decided I’d rather do that than stress about the misalignment misadventures with my novice machine quilting. Sometimes, hand stitching is just so much more soothing.

My partner has been out of town for the week and I’ve been filling my time with late nights of sewing and other creative entropy. It’s been really fun to satisfy my quilting lust and resuscitate this WIP, too. Hopefully, Part IV will be the finished jacket soon!

IMG_0077

Last of the winter layers

1-IMG_2365.JPG

When I felt the first chills of fall last year, I panicked just a little bit. I’ve lived in cold climates before, but had adapted my wardrobe to California’s temperate weather, and faced a serious lack of winter layers.

Specifically, I needed long sleeve shirts with long enough sleeves because covering your wrists is important for retaining body heat, and also because I’m very tired of hems coming up short. When Grainline Studio released the Lark Tee, visions of cozy, custom-fit base layers danced in my head.

IMG_2258 (1).jpg

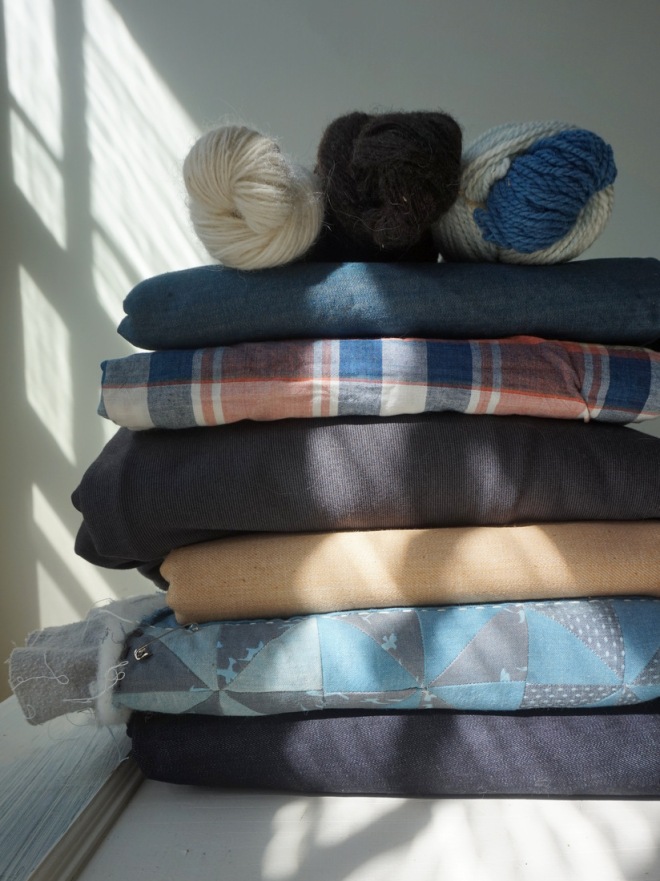
If I wasn’t focused warmth, I think the Lark Tee would make an excellent wardrobe staple in some organic cotton knit fabric, grown and milled in the USA, either from Alabama Chanin or Organic Cotton Plus. I tried to find a wool fabric of comparable domestic origins, but came up short. I found the greatest transparency with a little digging into some Pickering International blended knits from Fancy Tiger Crafts. I chose modal/wool in “seaweed” (no longer available) and heather gray organic cotton/yak down and was happy to support the lovely Denver shop I admire so much.

Waylaid by holiday projects, work, and I dunno, a general lack of enthusiasm for sewing knits, I actually didn’t get around to sewing a Lark until the tail end of winter. But back in January, when temperatures dropped below zero, I instinctively reached for the cozy gray knit and whipped up a Papercut Patterns Rise/Fall Turtleneck. After studying some instagram shots of the completed pattern, I went with the “Rise” body and the “Fall” neck for a slimmer fit with a full turtleneck. I lengthened the sleeves by 2.5″ and the body by 1″, which was a little bit cropped but all I could squeeze onto the yardage. Without even hemming the edges, I ended up wearing this top several days a week during the coldest spells.

1-IMG_2400

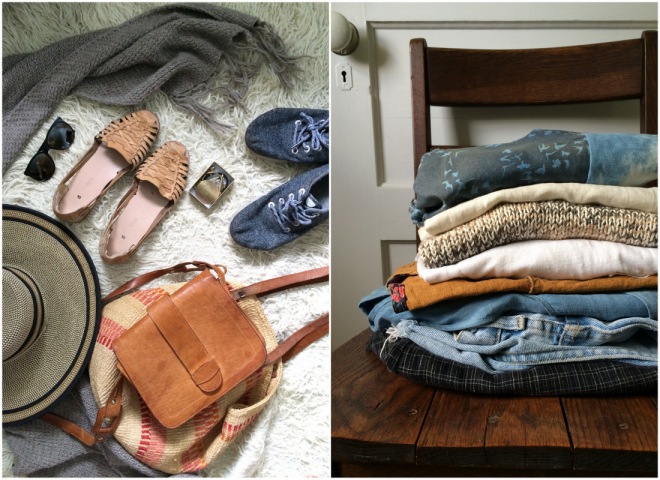
In January, I had the opportunity to help a local organization on a project launch, and ended up visiting their office once per week. The dress code was a pretty big step up from my work from home attire (and even my former SF office outfits), so I was really glad to have this turtleneck in the rotation. I especially enjoyed wearing it as seen here, with a vintage silk skirt, tights, and boots. My occasional commute was also much improved by an incredible wool cape that I found at a local vintage shop — it’s essentially a wearable blanket, which is both fun to wear and seriously practical, and also a little more stylish than the bulky sweaters I favor for casual wear. It made my wool coat (also thrifted) practically impenetrable to the icy winds on my walk to the bus stop.

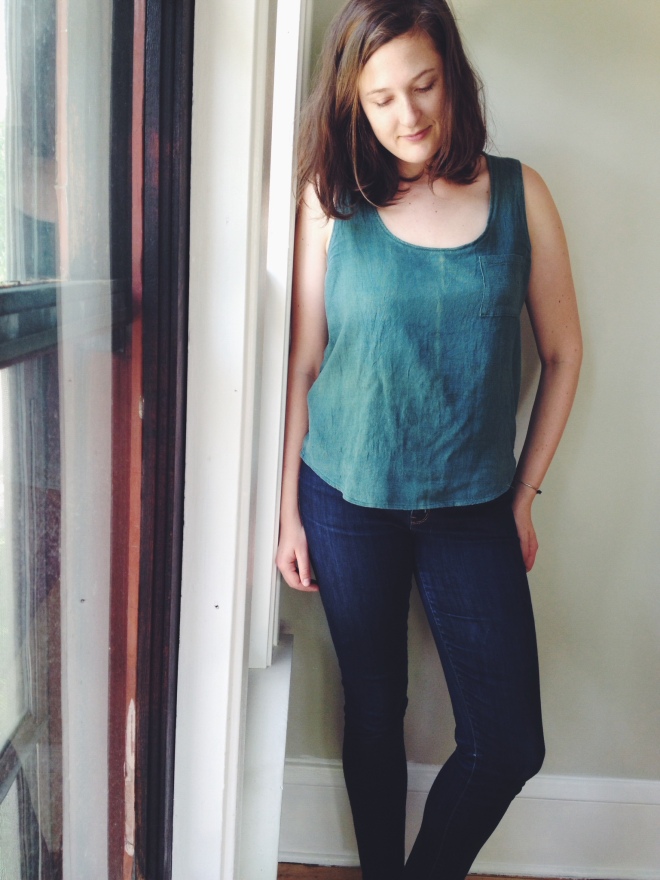
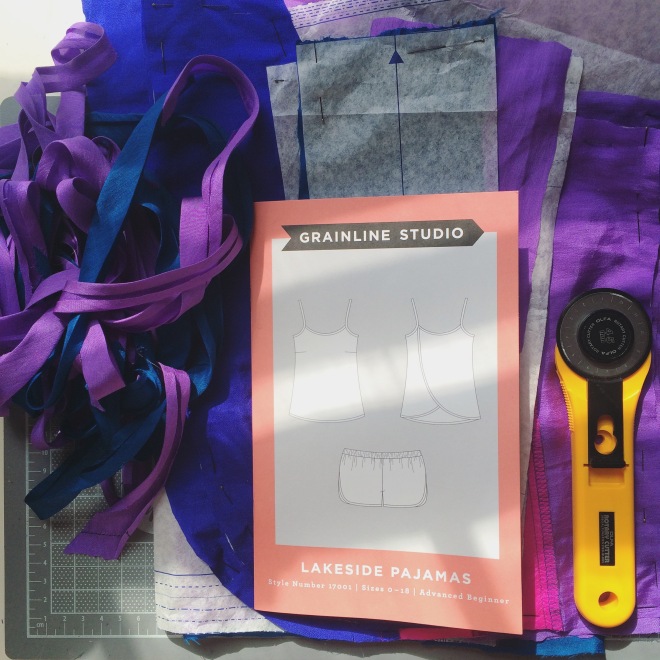
As for the Lark tee, I was a little worried that the drapey tissue-knit wool/modal blend would be tricky to sew. But I found it very easy to cut with a rotary cutter, and my machine handled it smoothly with a narrow zig zag stitch and a light ball point needle. I finished the edges with a twin needle which did create a bit of a bump, I think because the fabric didn’t have enough structure to resist bunching between the two rows of stitching, but it doesn’t bother me.

1-IMG_2358.JPG

If you’ve read other Lark reviews, many people have commented about the body length, and it’s true – the torso is long. I ended up cutting about 1″ off the length, but I also lengthened the sleeves by a total of 2″ for a really long, thumb-grazing cuff (when the elbows aren’t scrunched up, at least). I’m not really a fitted T-shirt person, my favorites tend to be a bit boxier and loose, but I like how the Lark is more “figure skimming” than close fitting, and I know I’ll make a few more variations. For this one, I found the armscye fit was much too droopy in the drapey and light fabric, so I just took in the underarm and sleeve curve until I was satisfied — about 3/4″ of an inch total where the sleeve meets the body. The photo below (albeit grainy) shows how I adjusted the armscye incrementally (I stopped when I liked the fit, and copied that shape and distance on the second side).

IMG_1607.jpg

In terms of materials, these two fabrics are exotic to me. I’ve seen this organic cotton/yak down blend used in a few indie fashion collections, and I think it’s a pretty good option for a “luxury” knit akin to cashmere blends. Despite it’s high-end reputation (which sort of connotes limited supply, in my mind), high demand for cashmere is turning “grasslands into a dustbowl” due to overgrazing, whereas Yaks are better suited to the landscape. I learned about the benefits of Yak down from the British knitwear brand Tengri, and I also like how Zady is positioning Alpaca as an alternative to cashmere, though I would love to see them support domestic Alpaca farmers. I’ve found local alpaca and alpaca/blend yarn pretty accessible, and a treat to knit with and wear.

Modal is another new one for me, and a fiber which I was hesitant about at first because it’s in the “semi-synthetic” family of fibers, like rayon. That means that although it’s derived from natural materials (wood pulp), the process of creating a yarn is more like a synthetic fiber (think Polyester or Nylon), which can be more harm than good. I can easily to go down an internet rabbit hole reading about wood pulp fibers (i.e. most rayons, including lyocell, Tencel, and Modal), which by many accounts are causing deforestation, and by other accounts are chemical-intensive and hardly worth the “natural”/eco-friendliness we associate with materials like bamboo.

But I’ve learned that there’s an important distinction: name brand wood pulp fibers, like Modal and Tencel, from the company Lenzing are lower impact because the company has 95-100% closed-loop production systems which reduces the chemical input and the effluent. And the inputs are more traceable because Lenzing only uses Austrian-grown Beechwood (for Modal)  which is not directly leading to deforestation. I appreciate this accountability and I think this technology offers better options than standard rayon or bamboo rayon, though the carbon footprint is probably still pretty high from the material use (trees) and transportation, so I aim to use them sparingly.

IMG_2361.jpg

Funnily enough, after ordering the fabrics I came across US grown and made wool knitwear from Ramblers Way, and it was on sale to boot! A set of long underwear, a henley, and a wool slip  (worn beneath my Lark tee in these photos) all proved critical for my winter wardrobe. If you’re looking warm, temperature-regulating layers, I’d definitely recommend them, and they’re vertically integrated with fair wages and low-impact dyes, all the good stuff. I wore the henley for winter running and enjoyed it so much more than plastic-y “tech” fabrics.

I love making clothes, and especially the ability to customize them (like lengthening the sleeves!) but increasingly it seems like there are ready-to-wear brands in the U.S. making more conscious decisions than fabric manufacturers, or perhaps it’s that they have more resources to devote to setting up a supply chain directly from the raw material. I like to support these clothing brands when I can, but then I miss the satisfaction and experience of making it myself. Do other makers feel this dilemma?

For next winter, I’m already dreaming of up-cycled wool leggings inspired by Tasha’s designs. I could see this working really well with a color-blocked design like the Aires legging, and maybe it would even work for athletic endeavors!

What are your cold-climate staples?


Indigo Tamarack: Part II

Part of the reason I was so suddenly smitten with Grainline Studio’s Tamarack Jacket pattern release was because I had recently attended a tour of local fiber farms through the Natural Fiber Alliance. If you’re in Minnesota or Wisconsin, I highly recommend the fiber tour that NFA puts together each fall. On the tour, I visited a local fiber mill and learned that in addition to spinning yarn, they produce roving, felt, and batting. So when the Tamarack pattern popped up in my Instagram feed I looked at it with new eyes: local wool quilted jacket.

Granted, I have never actually quilted anything before. But I need a mid-level jacket and want to support local farmers and mills as much as possible, so it seemed like the perfect project. I purchased the pattern, picked my fabric (and dyed it with indigo) and contacted the mill to order batting.

And then I waited.

It turns out that the mill I had visited mostly produces yarn and wool goods as a service — meaning they receive fiber from farmers, process it, and send it back — so they don’t have much retail or inventory available, and ultimately I needed to look elsewhere for batting. I really enjoyed doing a bit of research on quilt batting and thought I’d share a roundup of what I found:

Polyester:
When I called and visited local shops, or searched major online stores, I found that synthetic quilt batting dominates the market. I can understand why the low price point and washability would be desirable, but I really try to avoid plastic fibers both because I prefer the feel and benefits of natural fibers (and I wanted the warmth of wool for this jacket) and because synthetics are derived from fossil fuel and polluting the ocean.

Cotton:
Grainline Studio suggests cotton batting as an option for the Tamarack Jacket, and if you’re looking for a lighter weight jacket I’d recommend this Heirloom Cotton Batting from Organic Cotton Plus. It is organically grown and made in the USA, with no chemical additives to offgas in your quilt or jacket.

Wool:
Organic Cotton Plus also offers wool batting, and I kept it in mind as a backup (it is sourced internationally but describes the supply chain and processing with considerable transparency).

When I lived in the Bay Area I loved taking weekend trips north to camp in Marin, Sonoma, and Napa, and once visited Valley Ford Wool Mill. Nestled on a curve of road between rolling hills of pasture, Valley Ford is a working mill with a wonderful Mercantile that sells local wool bedding, yarn, garments, and felted goods. On my visit I bought a pillow, and I considered purchasing their wool batting for this project too.

Digging a little deeper into my local resources, I came across a broader list of Minnesota farms and wool mills, which led me to St. Peter Woolen Mill. This 4th generation family-owned mill is located about an hour from my house and specializes in wool bedding, including pillows, mattress toppers, and duvets, and I was elated to see that they offer quilt batting! Though the wool is not sourced within my immediate radius, I called to ask about their products and learned that they do source entirely from the U.S. (mostly the Western rangeland states).

Always looking for an adventure, I asked if I could pick up an order of quilt batting in person, and learn more about the mill, and mill owner Pat Johnson kindly obliged. The full tour included an interview for an upcoming research project, and provided an in-depth connection to the batting that I purchased. If you’re looking for wool batting or bedding, St. Peter Woolen Mill does an excellent job and sells online as well as wholesales to natural bedding stores around the country. They also offer a unique service: they will reconstitute your existing wool quilt or duvet. If you have a blanket that has gone lumpy or thinned out, St. Peter Woolen Mill can re-process it and send it back to you. The owner told me about family heirloom quilts that have been sent to the Mill multiple times to be re-made, and sent back to the family for continued use. I love this take on mending and making do, and it’s another great reason to invest in quality garments and goods that can last a lifetime (or longer). Batting in hand, I headed back to Minneapolis full of appreciation and excited to make a quilted jacket.

DSC00566

Eager as I was (and am!) to make and wear my Tamarack Jacket, I put the project on pause while making holiday gifts for loved ones and finishing end-of-year work assignments. I’ve changed my mind a few times on the details for this project, and am glad to be taking it slow. Next on the blog, I plan to post a roundup of my One Year One Outfit makes, resources, and processes. 

Indigo Tamarack: Part I

DSC00456 - croppedIMG_5962

A number of drafted blog posts have fallen by the wayside around here, and I hope to return to them in the early new year, but I’ve found that it’s easiest and most satisfying to post about my active projects, so I’m leaping out of chronology to talk about what’s on my work table now: a Tamarack Jacket.

Tamarack Dreams

I’m a big fan of Grainline Studio, from the pattern designs to Jen’s blog styling. The contemporary aesthetic and thorough instructions have played a huge role in my re-discovery and enjoyment of sewing in the last few years. That said, when Jen started hinting on Instagram that a quilted jacket pattern was in the works, I thought it looked great but was not something I would make — it looked laborious and I wasn’t sure if it fit my style. Yet by the time Grainline Studio released the Tamarack Jacket, temps here in Minnesota had dropped to the mid-40s and I had realized that my outerwear options were severely limited.

On the spectrum of warmth, between my Uptown jacket and a very heavy wool coat (one of my favorite thrifting scores), I was left with a 3/4-sleeves jean jacket and a zip-up fleece jacket I’ve held onto since age 12 and usually reserve for sporty activities. Suddenly, a Tamarack Jacket seemed absolutely essential for my daily life and wardrobe. I bought the pattern immediately.

One of the outcomes of participating in Slow Fashion October has been a growing awareness that I have enough. In fact, I have plenty. I have an abundance of beautiful yarn, fabric, garments to upcycle, dye project materials, etc.  Since time is my limiting factor, I’ve gathered a plentiful stash which I am excited to work with, but very wary of growing.

Turning to my stash, I quickly decided that two yards of this Organic, U.S.A. grown and made chambray would be perfect for my Tamarack. Purchased back in the summer with an Archer in mind, the chambray is colorgrown cotton, which is bred to produce natural pigments instead of plain white boules. The green color is very faint, with a silvery tone to it,  and while it’s really lovely, it unfortunately looked terrible on my skin tone.

Indigo to the Rescue

Last year, my wonderfully thoughtful partner, Jenn, gifted me an indigo shibori kit from Botanical Colors. For nearly a year I have treasured this kit — so much so that no project seemed worthy of its use. With the end of fall fast approaching, I seized the opportunity to finally make the indigo vat, with visions of a rich blue Tamarack dancing in my head.

The kit includes everything needed to create an organic indigo vat, or fruit vat, as designed by French chemist Michel Garcia. I followed the instructions provided by the kit, and cross-referenced The Modern Natural Dyer and this guide from Maiwa.

Though I’ve dyed with indigo before, I had never created my own vat, and I have to say it’s truly a magical process. If you’re not familiar, natural indigo requires a reduction process to make the dye available to fibers, meaning you have to remove the oxygen from the vat. Though blue on the surface, a reduced indigo vat is yellow-green, and fabric pulled from the vat is green at first, then turns blue as it is exposed to oxygen. An organic vat can be made in several ways (see the Maiwa guide for more), but the fruit vat uses fructose to reduce the indigo, and slaked lime (calcium hydroxide) to raise the pH (i.e. make it basic).

I decided to dye on an unseasonably warm weekend, knowing it would be one my last chances to be outside in 60 degree weather for many months. I prepared the mother in a large glass jar (above photos), let it rest and reduce, then created the vat in a 5 gallon bucket. Outside, I set up a clothesline and brought out 2 extra buckets filled with some water for oxidizing and rinsing the fabric.

DSC00457

While planning out the project, I was concerned that the kit would not be strong enough to get at least a medium shade of blue on all the fabric for my Tamarack. My 2 yards of colorgrown cotton were not quite enough to supply all the lining and exterior pieces, so I decided to use the largest scraps of similar-weight cotton from my stash for the remaining lining pieces. I didn’t want the jacket to look too hodge-podge, but I figured the indigo would be the great equalizer. So, after printing and assembling the pattern, I cut 2 of each piece from the various fabrics (back, fronts, sleeves, pocket).

All sources I’ve read say that you’ll get the strongest blues at the beginning of using your vat, so I started dyeing with my Tamarack Jacket pieces first to ensure a relative even color. I submerged each piece in the indigo for 4 minutes, moving the fabric through the vat gently to get an even color without adding oxygen to the vat. I hung each piece on the clothesline to oxidize (see below), and continued for additional dips to build the color gradually. Ultimately, I did two dips for the lining pieces and three dips for the exterior of the jacket. Once I felt satisfied with the shade of the Tamarack pieces, I continued dyeing other scraps and yardage from my stash; at the top of the post you can see the “before and after” piles and colors of fabric. After several hours playing the my indigo vat, the sun had set and I could tell the vat needed to be recalibrated (it had lost the bloom and coppery sheen on top, was cool in temperature, and producing very light colors).

DSC00469

Here are some of my indigo dyeing takeaways:

  1. Indigo is very temperature sensitive, and I found that the indigo mother reduced very slowly until I put it in a hot water bath and closely monitored the temperature. Once the temperature was steadily kept between 110 and 120 degrees (F), the indigo sedimentation fell steadily to the bottom of the jar and the navy blue bloom with coppery scum grew at the mouth. This is what you need to look for to know that the mother is ready.
  2. You probably don’t need to use the whole kit in one go. The kit says it contains enough indigo to dye 6 T-shirts to a medium shade. It doesn’t provide the weight of 6 T-shirts but I figured between the Tamarack pieces and other items I wanted to dye in my stash, I would exhaust the whole kit. In hindsight, I would recommend starting with half the ingredients in the kit, that way you have some fructose and lime leftover to help recalibrate the vat, and some additional indigo to create a new mother and reinvigorate it.
  3. You can reuse an organic indigo vat! The instructions from Botanical Colors don’t seem to mention this, but both the Modern Natural Dyer and Maiwa suggest that the vat can be saved and brought back to life. After drying all of my dyed pieces, I realized that the front pieces of the Tamarack pattern had a streaky effect where the dye washed out unevenly. I was disappointed, but then realized I could bring the vat back to strength and overdye them to hide the mistake. I followed the helpful guidance from Catherine Ellis’ blog and simply added fructose and made sure that my vat stayed between 110 and 120 (on the stovetop). It smelled like maple syrup and though the vat didn’t last as long, I concealed the streaks with 2 more dips per piece of the jacket.

I’m quite excited to begin quilting my Tamarack Jacket, though I’m nervous because I’ve never really quilted anything. I’m also a little nervous that repeated dyeing and washing may have shrunk my pieces or caused too much fraying in the seam allowance. What if I make the whole jacket up and it’s too small? It may have been wiser to dye the fabric instead of the pre-cut pieces. But I’m forging ahead with test quilting and basting my “quilt sandwich.” On my next post, I’ll write about my thought process and research into sourcing quilt batting.

DSC00493


anatomy of a travel capsule

IMG_5462

Last week’s theme for Slow Fashion October was small: 

handmade / living with less / quality over quantity / capsule wardrobe / indie fashion / small-batch makers / sustainability

I thought I’d document my own small travel wardrobe. I think I first heard the term “capsule wardrobe” about a year ago, and I was fascinated by projects like the 333 Wardrobe and the blog Unfancy, but at the time my wardrobe was mostly a hodgepodge of thrifted items which tended to have a little too much personality to be compatible in a pared-down capsule.

While I haven’t been purposefully working toward a capsule wardrobe, I’ve found that since I started making the majority of my clothes it’s been much easier to live with a smaller wardrobe, because I can make exactly what I want (within the realm of my sewing/knitting skills), my clothes are a more flattering and comfortable fit, and I know much more intimately how each piece functions and how it can play a role in my wardrobe.

Travel is such a good way to test this. What better “capsule” than a suitcase? In the past 6 weeks I’ve had the good fortune to take 3 trips of just over a week each — each with a unique climate and different dress code.

Here is what I packed, what worked, and what I could have done without:

Trip 3: Oakland, Berkeley, and Marin County, California (9 days) (pictured above)

  1. my favorite pair of cut-off jean shorts. They are high-waisted, light wash, and from a thrift store.
  2. 2 pairs of Hudson pants. One is of hemp/organic cotton knit, fabric was made in China by Pickering International, purchased online through Spool PGH. The other is of woven tencel fabric made by Feral Childe (fabric was probably made in China, but I know they screenprint most of their collections in the US) and purchased while visiting Fancy Tiger Crafts in Denver. I wear the knit pair as my pajamas and the woven pair has become an indispensable casual trouser — coming to the blog soon!
  3. a pair of black Virginia leggings in a heavyweight organic cotton/spandex knit from Organic Cotton Plus, US grown cotton, fabric made in the States (in the Carolinas or Tennessee if I had to guess), dyed using low-impact synthetic dyes. I sewed these the night before I left for England and they were a perfect fit for my body and my travel needs! I made them extra long and it feels like a luxury to have a little bit of fabric scrunching at my ankles.
  4. 5 shirts: one khadi Scout Tee (blogged here), one woven sleeveless Hemlock Tee (blogged here), one black Everlane v-neck, one white linen tee from Zady, one organic cotton graphic tee (free from a volunteer gig) that I wear as a sleep shirt. I absolutely love what Zady is doing with transparency and timeless pieces – check them out if you’re looking for ready to wear clothes! I’m pretty over Everlane’s faux “radical transparency” so I won’t be purchasing from them again, but a classic black v-neck does come in handy. I would recommend CA Cloth Foundry (US grown & made with Sustainable Cotton Project fiber) and Be Good Clothing (organic, Indian grown & made) for basic knit tees.
  5. a cocoon-shaped tunic from Hackwith Design House, purchased at their sample sale this summer. I really admire this Minneapolis-based brand who produces all their clothing in their St. Paul studio and releases pieces in limited collections, bucking the typical fashion season system. They don’t use organic materials (that I’ve seen) but have an eye toward sustainability and source a lot from a deadstock fabric warehouse in the Twin Cities. This tunic feels like a tencel blend, and even on sale it was a big purchase for me but I am so in love with it.
  6. 2 prism dresses. One long-sleeved in khadi from A Verb for Keeping Warm (blogged here), the other short-sleeved in organic cotton fabric that was grown by Sally Fox, made in Japan, and purchased at A Verb for Keeping Warm. What can I say, I love this simple dress pattern. The short-sleeved dress is my new “special occasion” dress that I made in part for this trip; check back for its origin story.
  7. 3 Northern California Fibershed sweaters. One pullover, color-blocked Hayward sweater in Twirl Yarn Twirling Petals, purchased at Knitterly Petaluma, the first sweater I ever knit! One pullover, cropped Ondawa in Radius Yarn (sourced from Windrush Farm), purchased at Knitterly Petaluma. One cocoon wrap/shrug Escher in Twirl Yarn, purchased at Knitterly Petaluma and one skein at the Fibershed stand at the farmer’s market.
  8. my jean jacket. boxy, 3/4-sleeves, from the thrift store.
  9. a cashmere beanie, also from Everlane, very warm and soft but would not purchase again (would knit my own or purchase locally).
  10. Sven clogs & Birkenstock sandals.
  11. underwear & socks, nearly all old & unremarkable, but hopefully to be replaced by handmade versions soon! While in Oakland, I purchased a Pansy bra after at least 6 months of deliberating — I’m in love with it!

IMG_5367

(leggings + clogs on a rare rainy day in Oakland. Also wearing: Hackwith tunic, Escher)

Trip 2: London & Plymouth, UK (9 days)
Nearly the same, but I swapped:

  1. raincoat instead of jean jacket. Purchased from American Apparel several years ago, pockets are unfortunately wearing out.
  2. 2 light dresses instead of jean shorts. One is an organic cotton Alder shirt dress made of remnant fabric from a Feral Childe sample sale (available online here!). The other is a Charlotte Kan tie-dress in a striped linen-cotton blend, purchased from Fabric.com with a certain amount of guilt (no idea where/how it was made, but I could not get those stripes off my mind!).
  3. ankle boots instead of birkenstocks. They are sort of oxblood color, purchased on clearance at Free People, made in Spain I believe. I’ve had them resoled and fixed up twice and they have lasted longer than previous pairs, but they start to pinch my toes after a whole day of walking.
  4. loafers (thrifted, resoled) as a back up pair of shoes, but I didn’t end up wearing them.
  5. a kanga/cotton shawl/large scarf, purchased when I was in Tanzania. Helpful to have a big rectangle like this as a multipurpose item – I wore is as a scarf, a blanket on the plane, and wrapped up food and small items in it.

Trip 1: Eastern seaboard (CT & RI), USA (7 days)
Nearly the same as trip 3, I think (I didn’t document it at the time), but I hadn’t made the leggings or short-sleeved Prism dress, so I packed the striped linen-cotton tie dress. I also added:

  1. a bathing suit from J.Crew, one piece V-neck.
  2. a sun hat gifted/handed down to me from my mom 🙂
  3. my Sallie jumpsuit in black organic cotton knit purchased at Verb a really long time ago (probably made in China by Pickering?). I love this jumpsuit but it collects all the dust and cat hair really quickly, so it’s not that helpful for traveling (without a lint roller, at least).
  4. Nisolo Ecuador Huarache sandals in the color almond, I think ? I saved up to buy these this summer as lightweight but close-toed shoe, and I love the style but unfortunately they’ve stretched out a little too much. Not sure what to do about that… Alas, we’re heading into cool weather here pretty fast.

IMG_5417

(jean shorts + linen Zady tee + Escher sweater in Oakland, also basically my summer uniform. Worn with clogs)

the takeaway

  • I could have gone with 1, maybe even 2 fewer shirts for my California trip, but I was afraid that one or two would get smelly from a few days of physical labor, so I packed extra.
  • To pack even lighter, I could have left my Hayward sweater at home for my California trip, because I wore the Escher wrap/shrug most days and Ondawa when it was cold (the heavy alpaca-wool blend was a lifesaver when I camped one night).
  • I only wore the beanie once in California (while camping, and it did keep me warm!), so if I weren’t camping I could have left it at home.
  • I wish I hadn’t waited so long to buy a Pansy bra, it’s my new favorite thing! I also wish I had budgeted to get some of their undies too, but I do hope to make some cloth habit ladyshorts with scrap knit fabric.

The big takeaway is that I think I’ve been basically wearing this “capsule” all summer, hah! It’s been very liberating to not have to dress for an office (and a bike commute) every day, so I’m lucky in that respect. The leggings are a huge help toward transitioning this capsule into cooler weather, but I’m starting to get nervous that 3 years in California has left me without much of a winter wardrobe. I’m planning out what to knit and sew pretty furiously, but of course, trying to keep it slow!

khadi chronicles pt. 1

khadi chronicles_1

when I came across khadi by the yard for sale at A Verb for Keeping Warm I was enchanted. To me, khadi is powerful cloth. Incredibly alluring, especially if you like the feel of course linen and natural colors and small textural reminders that human hands made your cloth, but beyond that it is politically potent. Five years ago I had the opportunity to participate in an incredible study abroad program which traveled from the US to India, Tanzania, New Zealand and Mexico and explored the impacts of globalization and grassroots resistance — it was a pivotal journey for me intellectually and emotionally, one which I am grateful for every single day. I first learned about the history of khadi while in India, so seeing and touching it was a visceral reminder of that journey and the (positive and negative) transformative potential of textiles.

khadi chronicles_8Khadi is a term for handspun and handwoven cloth, but it is also emblematic of the movement for Indian self-reliance and freedom from British colonialism. Gandhi advocated for each person to spin their own cotton and each community to weave their own cloth so that the Indian people would create home-grown textiles rather than buying fabric back from the British who held tight control over the cotton markets. Gandhi encouraged a daily practice of spinning with a foldable spinning wheel or charkha and community-scale fiber farmning, weaving, dyeing, and block-printing; a true example that the revolution begins at home. (This cursory overview of the history of khadi was imparted by my teacher in India, Saatchi, and a brief stay in the village and ashram of Sevagram; this website is another resource). While I doubt all khadi cotton is still spun at home on a charkha, some of this cottage industry remains, both for educational purposes and cloth production.

khadi chronicles_3

I bought a meager yard and a half, maybe even just a yard and a quarter, of organic cotton, naturally dyed khadi that day at Verb, and at the time I wasn’t really sewing clothing. I guess that khadi was the start of my stash, and I treasured it, saving it until I had dusted off my sewing skills. Even then, cutting into this plainweave, turquoise fabric made my heart jump! But this simple Wiksten tank has become a wardrobe staple for me.

khadi chronicles_4

I chose the Wiksten tank pattern because I wanted a garment with a modern, simple design that would be straightforward for my beginner sewing skills and showcase the beauty of this cloth. The yardage had natural color variations including a large faded streak that I intentionally placed along the center back.

Nearly a year later I felt more confident in my sewing skills and I was fortunate to have a slightly larger fabric budget, so I returned to Verb to buy more khadi — this time gray and brown stripes of the same thick, organic, naturally dyed cloth. On the eve of Me Made May I sewed up a Scout Tee with added volume in the back (using Jen’s great tutorial for slashing & spreading the pattern) and lengthened sleeves (+2″ I think?). When I bought the fabric I had a Scout tee in mind because again I wanted a classic, modern wardrobe staple, but I definitely thought that the stripes went horizontally. Not so! The stripes run along the grainline and the cloth is pretty narrow, so I forged ahead with vertical stripes, and I’m very pleased with it.

khadi chronicles_6

Both of these tops are now part of my core wardrobe, and I love that each time I wear one I’m reminded not only of my own travels but of the incredible journey from field to garment. With this narrative in mind, I made sure to wear my khadi Wiksten as part of my outfit for Fashion Revolution Day:

fash_rev outfit

Stay tuned ~ tomorrow I’ll be posting another khadi garment & a few more words about my love for this cloth!