
Is it obvious around here that I’m enamored with indigo blue?
You’ll find it in my yarn stash, on my cutting table, in my closet of course, in a bucket in my “studio” and this year, in my garden.
Japanese indigo, polygonum tinctorium to be exact.
Tended from wee seedlings in my sunroom (slash home office) to a patch in my landlord’s flower garden, I’ve been caring for my own little plot of blue, biding my time until the shiny green leaves begin to bruise and hint at the pigment within.
But what to do with the leaves? I sowed, composted, weeded, watered, and looked on adoringly while not entirely sure what I would do when it came time to harvest. Mostly because I wasn’t sure how much would crop up, and what method would be feasible.
See, I’m trying to avoid synthetic chemical intervention. Indigo is a peculiar natural dye, requiring the removal of oxygen before the color can bind to any material. This makes it magical, in a way, because when you pull something from an indigo vat you witness the pigment’s reaction with oxygen, changing from green to blue in midair.
A lot of recipes take natural indigo and add a reducing agent, called Thiox or Spectralite or, in a pinch, Rit Color Run Remover. To avoid this additive, there are a host of more-involved processes that involve fermenting the fresh leaves and feeding the vat things that will give it sugar and things that will raise the pH.
But these things are at once precise and imperfect, never a guarantee that you’ll get color at the end of your days brewing and calibrating — best done with an experienced eye.
At least that’s my take. So while I’m figuring out if and how to go the fermentation route with my backyard harvest, I decided to try dyeing with just one simple ingredient: ice water.
I’d heard a rumor about this method a few years ago, and mentally bookmarked The Dogwood Dyer’s tutorial when I later came across it. Indigo expert (in my opinion) Rowland Ricketts has a few notes on it, and plant palette artist Sash Duerr raves about the resulting colors.
I trust these incredible people, so I gave it a try. And it’s really very simple, but you need a stretch of uninterrupted time and, if you’re like me, you need to put out extra rags and buckets because it’s always going to get a little messier than anticipated.
Simply put: harvest your mature indigo, cutting off the stalks (leaving room for regrowth if your season allows), then remove the leaves, blend them with ice water, strain that and use it as your dye bath.
Specifics from a Saturday afternoon:
- Prepare material by submerging in room temperature water for at least an hour. I chose skeins of yarn including local wool, secondhand wool blend (I think), and secondhand silk, all of which had been scoured previously, and the secondhand materials had been mordanted with alum.
- Weight of goods: 625 g all together
- Weight of harvested leaves: 206 g
- Ice water prepared by emptying all available ice cube trays into a bowl, allowing to melt at room temperature for half an hour, then filling the bowl with cold tap water.
- Leaves were blended in batches with enough ice water to move freely.
- Strained blended mix using a mesh sieve, but the mix was too finely blended, so switched to using cotton gauze and squeezing it through.
- Mixture was neon green and very frothy, tiny leaf particles impossible to strain out.
- First dip: local wool skein submerged approx. 5 min.
- Second dip: silk skeins submerged approx. 10 min.
- Third dip: mystery wool skeins submerged approx. 10 min.
- Fourth dip: local wool skein again for approx. 10 min.

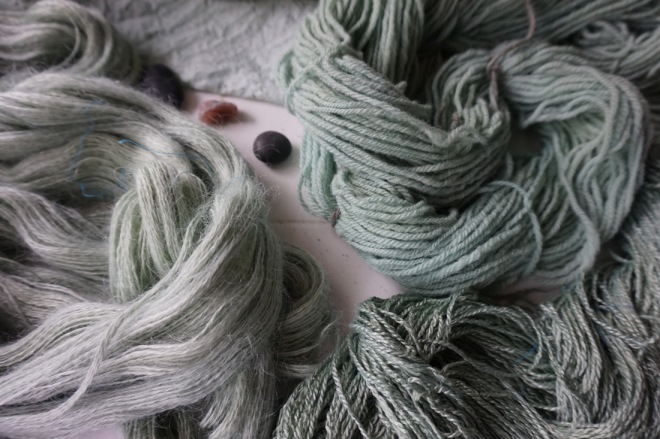
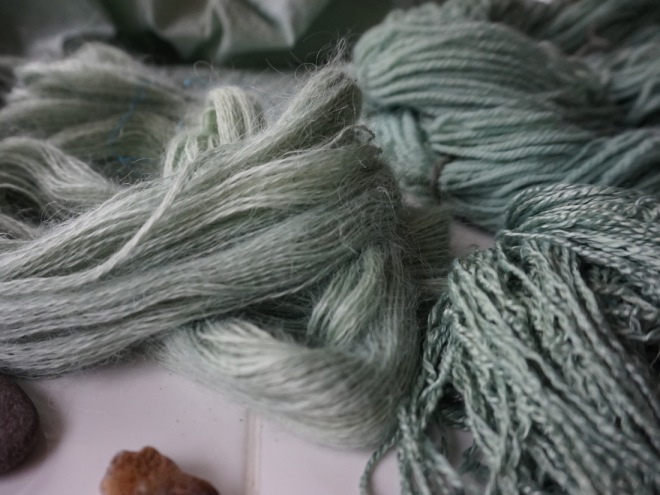
Each skein of yarn came out of the bath a vibrant shade of neon green, like pure chlorophyll. When I’ve used powdered indigo vats (like so), I’ve noticed the oxidation process beginning almost immediately, transitioning to teal and then toward blue. With this process, I waited 10 minutes after the first skein and it was still a solid green, so I put it in the tub of water where the undyed skeins for soaking. By the time I finished a first dip of each yarn, the early skeins were starting to edge on turquoise, but still, it was the slowest oxidation I’ve ever seen.
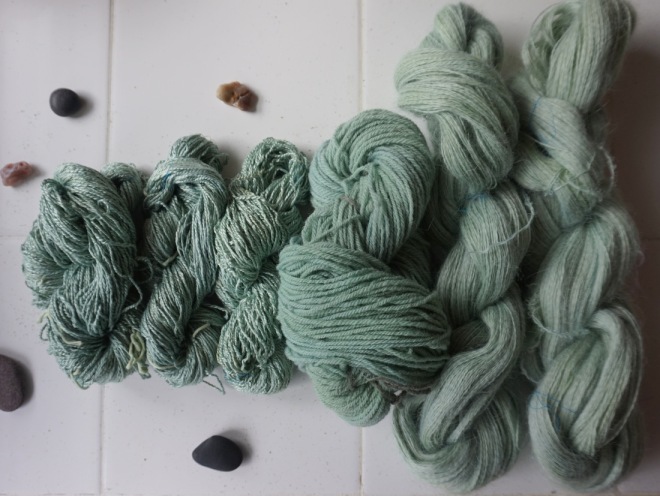
Once I had cleaned up, I rinsed out excess dye and then hung the skeins on my portable drying rack, an ombre of jade and bright emerald. By mid-morning the next day, the outside of each skein was dry and aqua in color, but the interior strands were still damp and holding onto green. I found a two-part article that suggests the green continues to disappear as time goes on, but that the blue tones are fairly lightfast. You can see that even in this small series of photos, the color shifts easily with the quality of light.
At first I found the persistent green frustrating – I wanted blue! But the slow transition into turquoise is a magic all its own. And the most magnificent thing, for a Saturday afternoon in my makeshift setup, is the ease: no synthetic compounds meant I could splash with abandon (or at least, give in to accidental overflow), and compost the finished bath.

Fascinating and beautiful! I really like these soft colors, and I’d love to know how they hold up over time.
LikeLike
Thanks Tasha! I’m curious as well. I’ll try to do a follow up sometime in the future 🙂
LikeLike
Oh, I am in love with those colors and the process!
LikeLike
Thanks! So vibrant 🙂
LikeLike