Cautious spring color

spring color_darning

I’ll admit to feeling some winter funk lately, after a few fleeting warm and sunny days and a return to grey. I’m craving color, cheer, change — signs of life.

(It’s snowing again as I write this).

I funneled some of my restless spring energy into a Pinterest board, a holding space for all things bright, bare ankled, and smock-pocketed.

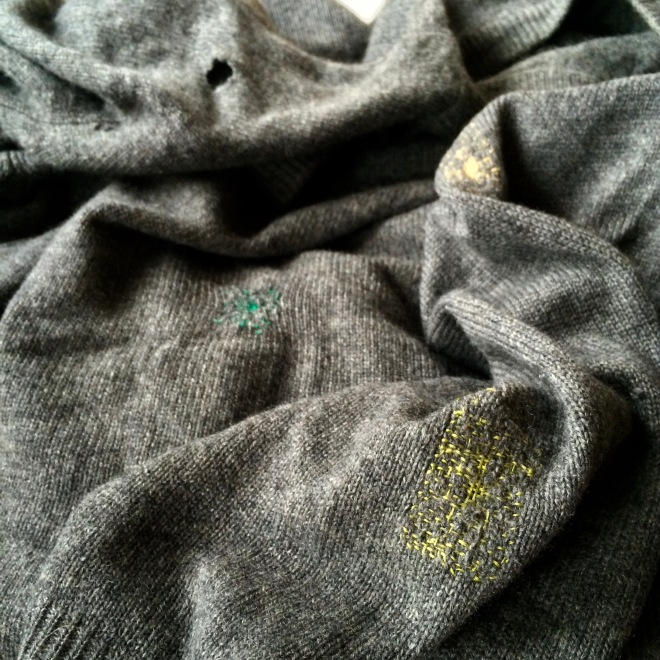
But I’ve found another outlet: imbuing the last of my winter projects with a bit of spring fever, creating my own vibrancy until the landscape gives way. It started when I finished my big winter knitting project, the Exeter cardigan, and even worked through a few smaller gift items. Finally, restless fingers found time to pick up a holey hand-me-down cashmere sweater, fumbling my way through some experiments in darning.

Inspired equally by the visible mending movement and the shabby slouchiness of a sweater past its prime, I decided to accentuate the darning with contrasting thread colors from my collection of vintage spools.

It takes a closer eye and a bit more fine-tuned attention than evening knitting, but I’ve actually been really enjoying darning, turning each little hole into a tapestry. The overall effect reminds me of days spent in the painting studio, returning home with splotches of my palette in unsuspecting places, building color onto garments instead of canvas.

spring color_sock

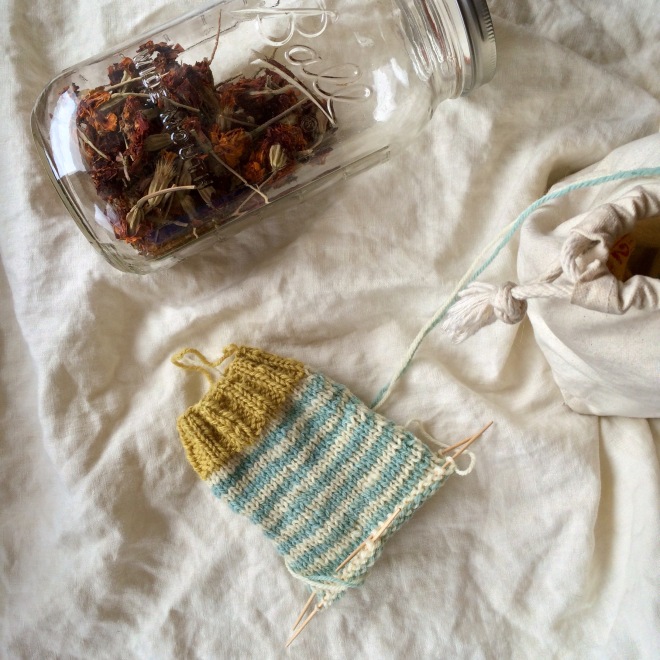
This cheery nod spilled over into my next knitting project, a simple pair of socks I’ve been wanting to make out of some local Babydoll Southdown wool. Last summer, I dyed half of my lot in fresh indigo, so I decided to swatch in stripes. But it seemed like it was missing something, so I divided off another portion of the white yarn and made a quick dye bath of dried marigolds. The bright yellow is unexpected but exactly what I needed — sort of a, when life won’t give you daffodils, make your sunshine, kind of shade.

A sea of fresh indigo

5-2016-09-19-11-14-45

Is it obvious around here that I’m enamored with indigo blue?

You’ll find it in my yarn stash, on my cutting table, in my closet of course, in a bucket in my “studio” and this year, in my garden.

Japanese indigo, polygonum tinctorium to be exact.

Tended from wee seedlings in my sunroom (slash home office) to a patch in my landlord’s flower garden, I’ve been caring for my own little plot of blue, biding my time until the shiny green leaves begin to bruise and hint at the pigment within.

But what to do with the leaves? I sowed, composted, weeded, watered, and looked on adoringly while not entirely sure what I would do when it came time to harvest. Mostly because I wasn’t sure how much would crop up, and what method would be feasible.

See, I’m trying to avoid synthetic chemical intervention. Indigo is a peculiar natural dye, requiring the removal of oxygen before the color can bind to any material. This makes it magical, in a way, because when you pull something from an indigo vat you witness the pigment’s reaction with oxygen, changing from green to blue in midair.

A lot of recipes take natural indigo and add a reducing agent, called Thiox or Spectralite or, in a pinch, Rit Color Run Remover. To avoid this additive, there are a host of more-involved processes that involve fermenting the fresh leaves and feeding the vat things that will give it sugar and things that will raise the pH.

But these things are at once precise and imperfect, never a guarantee that you’ll get color at the end of your days brewing and calibrating — best done with an experienced eye.

At least that’s my take. So while I’m figuring out if and how to go the fermentation route with my backyard harvest, I decided to try dyeing with just one simple ingredient: ice water.
1-2016-09-19-11-01-30

I’d heard a rumor about this method a few years ago, and mentally bookmarked The Dogwood Dyer’s tutorial when I later came across it. Indigo expert (in my opinion) Rowland Ricketts has a few notes on it, and plant palette artist Sash Duerr raves about the resulting colors.

I trust these incredible people, so I gave it a try. And it’s really very simple, but you need a stretch of uninterrupted time and, if you’re like me, you need to put out extra rags and buckets because it’s always going to get a little messier than anticipated.

Simply put: harvest your mature indigo, cutting off the stalks (leaving room for regrowth if your season allows), then remove the leaves, blend them with ice water, strain that and use it as your dye bath.
2-2016-09-19-11-01-55

Specifics from a Saturday afternoon:

  • Prepare material by submerging in room temperature water for at least an hour. I chose skeins of yarn including local wool, secondhand wool blend (I think), and secondhand silk, all of which had been scoured previously, and the secondhand materials had been mordanted with alum.
  • Weight of goods: 625 g all together
  • Weight of harvested leaves: 206 g
  • Ice water prepared by emptying all available ice cube trays into a bowl, allowing to melt at room temperature for half an hour, then filling the bowl with cold tap water.
  • Leaves were blended in batches with enough ice water to move freely.
  • Strained blended mix using a mesh sieve, but the mix was too finely blended, so switched to using cotton gauze and squeezing it through.
  • Mixture was neon green and very frothy, tiny leaf particles impossible to strain out.
  • First dip: local wool skein submerged approx. 5 min.
  • Second dip: silk skeins submerged approx. 10 min.
  • Third dip: mystery wool skeins submerged approx. 10 min.
  • Fourth dip: local wool skein again for approx. 10 min.

1-process.jpg

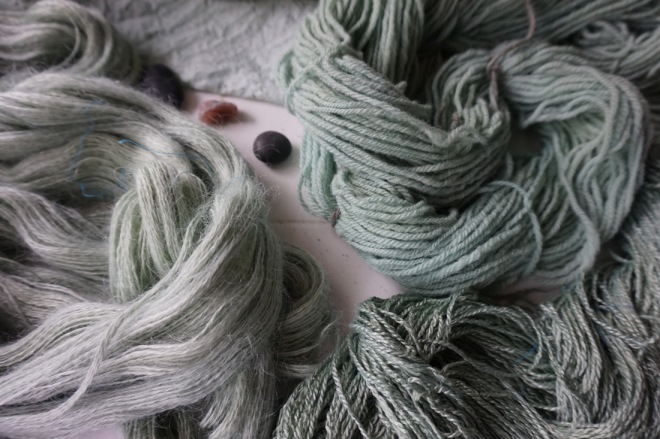
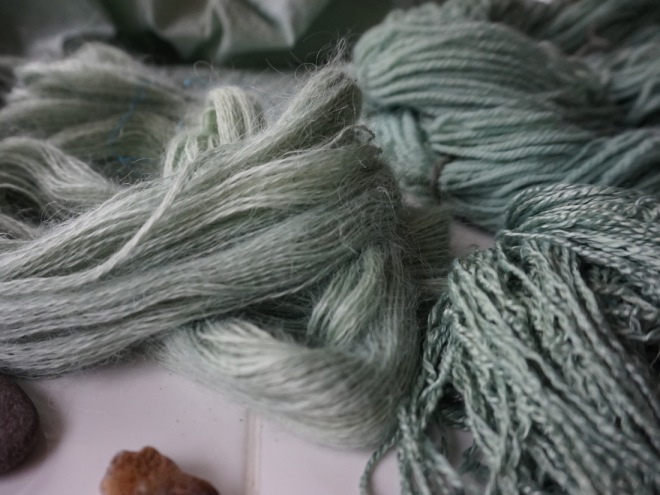
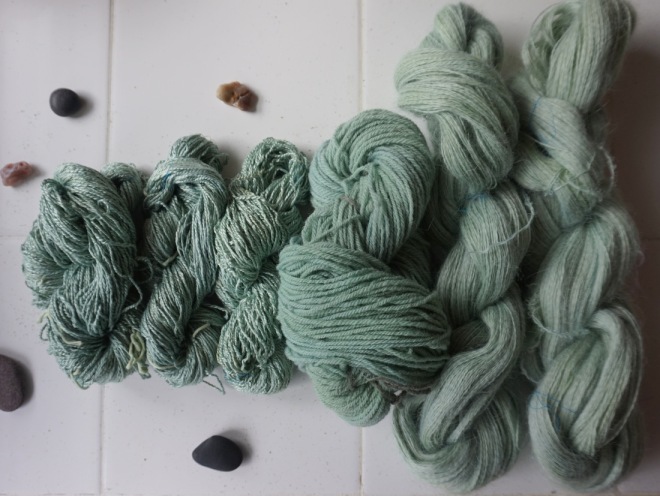
Each skein of yarn came out of the bath a vibrant shade of neon green, like pure chlorophyll. When I’ve used powdered indigo vats (like so), I’ve noticed the oxidation process beginning almost immediately, transitioning to teal and then toward blue. With this process, I waited 10 minutes after the first skein and it was still a solid green, so I put it in the tub of water where the undyed skeins for soaking. By the time I finished a first dip of each yarn, the early skeins were starting to edge on turquoise, but still, it was the slowest oxidation I’ve ever seen.

Once I had cleaned up, I rinsed out excess dye and then hung the skeins on my portable drying rack, an ombre of jade and bright emerald. By mid-morning the next day, the outside of each skein was dry and aqua in color, but the interior strands were still damp and holding onto green. I found a two-part article that suggests the green continues to disappear as time goes on, but that the blue tones are fairly lightfast. You can see that even in this small series of photos, the color shifts easily with the quality of light.

At first I found the persistent green frustrating – I wanted blue! But the slow transition into turquoise is a magic all its own. And the most magnificent thing, for a Saturday afternoon in my makeshift setup, is the ease: no synthetic compounds meant I could splash with abandon (or at least, give in to accidental overflow), and compost the finished bath.
4-2016-09-19-11-07-46


Capturing summer

1-2016-09-026

The seasons are so dramatically different here, the changes are less like a marker of passing time, almost a sort of temporal amnesia.

I remember in spring — May, specifically — when the lilac that climbs the fence along our driveway began to bloom. The day we first looked at this apartment, the lilac was like a row of garlands below the windows as we walked through half-empty rooms, trying to picture ourselves here. By the time we moved, it had all but disappeared, the greenery no less spectacular than the abundant leaves and shrubs of the neighborhood. When it returned, I was giddy like it was our own private fireworks display, unfurling and completely unexpected.

Even in summer’s peak humidity (and this one, oh, it was humid) I would catch hints of our former, wintry life. Brushing up against my wool coat as I reached for the bucket of indigo vat below. An incessant bug bite on my hand nagging like dry knuckles.

This isn’t about lilacs, but about remembering — bringing a little bit of summer sunshine with us into the depths of winter.

1-2016-09-25-09-38-39-2

I didn’t get a chance to plant as much of a dye garden this year as I’d hoped. I started some indigo seeds in a tray, generously gifted by a friend from California, and some weld too, which didn’t take. I kept meaning to sprinkle a pack of marigolds and coreopsis in the front yard, but I couldn’t keep up with the weeds long enough to clear space.

I’m grateful for the opportunity to tend my indigo patch, which has been low maintenance thanks to well-timed rain showers, but found myself envious of the yellow and orange blooms all around, my eyes peeled to distinguish coreopsis from black eyed susans from the car window, spot tansy on my bike rides, or catalogue all the marigolds along my running route, mentally weighing the volume of goldenrod plumes.

1-ecoprint-curtains

Picking a few here and there wouldn’t hurt, I told myself. But you can’t clear cut your neighbors’ wildflowers, even if they don’t love them like you love them. (I told myself.)

An ecoprint seemed like the perfect way to honor summer’s colors and my neighbor’s property lines.

img_9216

Several months ago I found a perfectly crisp and white cotton sheet at the thrift store, and though it’s not the drapiest fabric, I knew it would be a cost effective way to get the amount of yardage needed for the double window behind our bed.

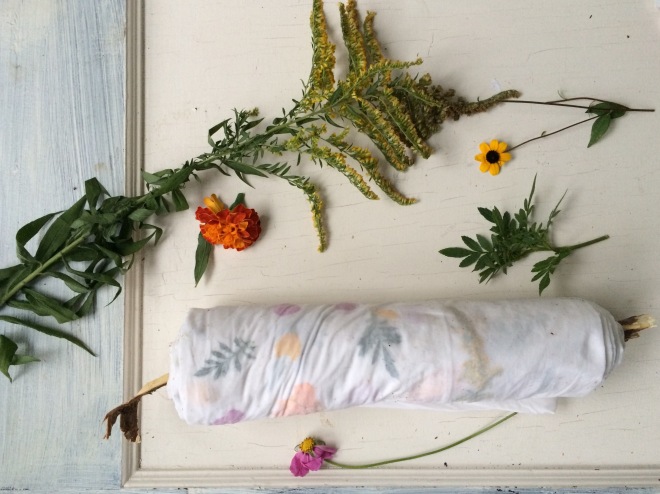
I roughly followed the ecoprinting instructions for the Flowers at My Fingertips kit in The Modern Natural Dyer: I cut the sheet down to size, weighed it, scoured it in the washing machine, mordanted with alum acetate, and gave it a wheat bran bath dip. Then, I strolled through my neighborhood and picked a few flowers here and there in streetside planters and the edge of the community garden. I focused on plants I’d heard were good dyeing: cosmos, marigolds, goldenrod, black eyed susan, and a yellow flower that looks like a version of coreopsis.

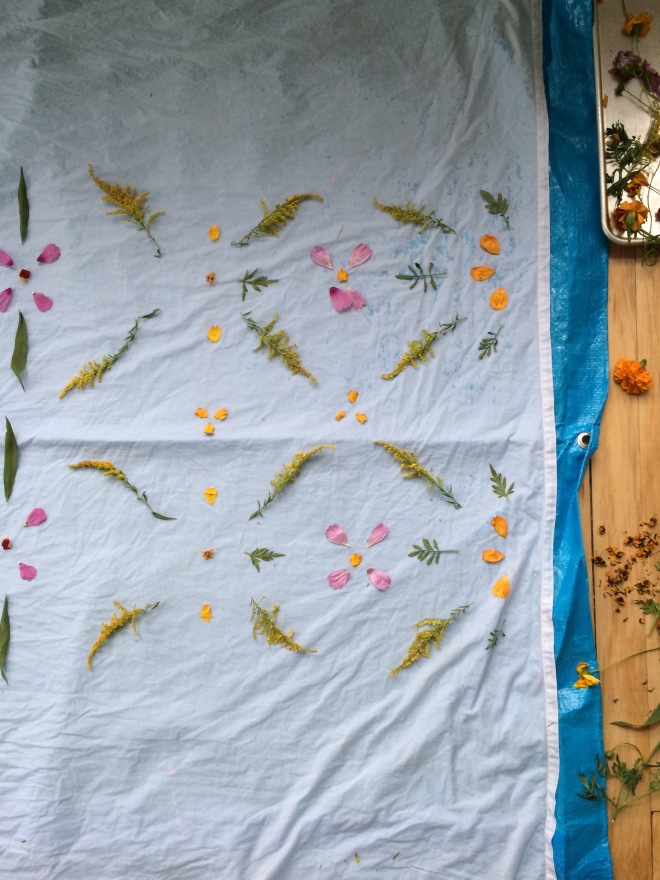
My goal was to try to make a geometric print by plucking out petals and leaves and laying them out like mandalas. I knew the whole bundle had to fit into my dye pot, so I measured the full width of the pot and then used that to determine how to fold and layer the fabric — essentially I divided width into quarters and only placed flowers on the middle half, then folded the blank edges over to meet in the middle.

img_9202

Some tips: use freshly picked flowers, keep the material damp, and put down a tarp! It took me most of a day to lay out the flowers along the length of the fabric, since I had various errands and things to do periodically, so having the tarp underneath was important to protect the floor, and a spray bottle of water helped keep all the pieces in place.

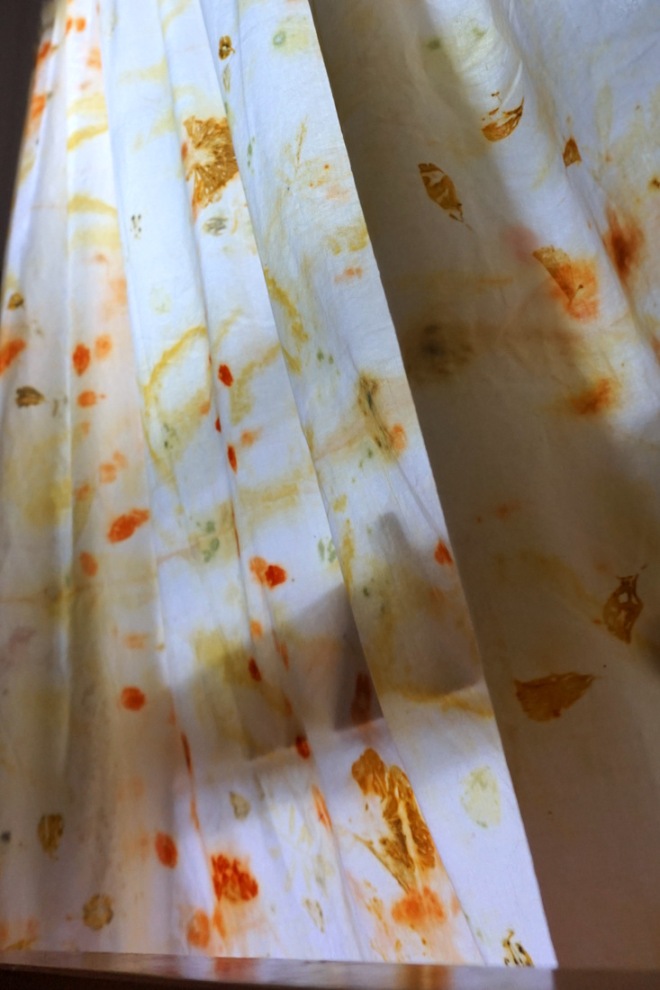
The result is a bit of a kaleidoscope blur, swirls of yellow and orange, petals and leaves dancing across the surface. This was my first time attempting a pattern with bundle dyeing, and I love the result but I also had an ‘aha’ moment when unrolling it: to achieve a more defined pattern, you actually want to avoid repeating the same placement (for instance, the mirrored goldenrod blooms, above) and place the material in a staggered arrangement so that when you roll it up the elements will overlap very little or not at all.

Already I feel the days shortening and the quality of light shifting, but stitched into curtains and backlit by sunrise, this print lets me hold onto summer just a little bit longer.

1-2016-09-25-09-37-07