An A-frame skirt, at long last

1-2016-12-19-14-58-12

Good things take time

is that an overused adage?

(You may remember, this skirt was first up to bat in my fall queue; it is also, apparently, the snail-paced slowest of slow fashion garments I think I’ve ever made — partially cut in May, tabled until September, resumed, dropped, and a grand finale in the final days of my ‘fall capsule’ – but who’s counting?)

4-2016-12-19 15.02.30.jpg

I honestly thought I would finish it by early October at the latest, but that didn’t happen, and then time seemed to hop skip & jump until late November. Post-election, hands-to-work-and-hearts-to-heaven & all, it brought me strength and comfort to work on this garment, which I came to view as a cumulative, collaborative effort of creative businesswomen who inspire me.

The fabric: grown by Sally Fox, an organic cotton in natural brown, raised in Northern California; made in Japan when the textile industry all but collapsed around her; imported many years later by Kristine Vejar and purchased by me from her shop, A Verb for Keeping Warm (available online here).

The pattern: designed by Taylor McVay of Blueprints for Sewing, who draws on architectural details for thematic, visionary patterns (and whose creative space in Western MA I am secretly incredibly envious of); available online here.

8-2016-12-19-15-26-12

Finally, in my own drafty little hall closet sewing space, I pieced together these amazing, origami-like pockets, emphasizing the “wrong side” of the fabric which shows a bit more of the natural brown hue of the cotton, then slowly the panels of the skirt. I finished all of the interior seams with bias tape made from scraps, and dutifully pressed and pinned it all to lay flat. I installed a lapped zipper, first by hand and then by machine, it’s not quite hidden but I don’t really care. (it’s this one, in glorious brass and organic cotton which has ruined me to all other zips). I basted the side seams and tweaked the fit twice (thrice? maybe.). Finally the waistband, a vintage button from my stash, and a hand-bound buttonhole as the sun set on holiday cookie baking.

It truly would have been a perfect piece for my fall capsule, when the weather allowed for bare legs but long sleeves; I even remember wishing it was just done already so I could wear it. But actually, it’s perfect for winter too. Maybe not negative-thirty-plus-wind-chill Minnesota polar vortex winter, but on your average frosty winter day, it’s sleek over a pair of tights and a perfect complement to slouchy sweater and pile of knitted accessories.

Exhibit A:

2-2016-12-19-14-58-47

Pattern notes: I did make a muslin, in a comparable-weight fabric (some sort of cotton canvas that came from a free bin), and I highly recommend that. I chose View A, the more “pencil skirt” shape, and I knew I wanted it to be a little more ‘penciled’ than the original. I marked that on my muslin and took a bit of width out by narrowing the side panels at the bottom. I also graded from a larger to a smaller size at the waist and hip, per my measurements, and in fitting the final skirt I let out the hip just a little bit more. I used a 6″ zipper instead of the recommended 9″ but have no problem getting the skirt up (I did the same on the muslin to test it), and I lengthened the skirt by following the lines all the way down to the largest size, but not beyond that. It falls just above the knee on me, instead of below, and I considered drafting a facing instead of folding up the hem to keep the length, but I actually think this is a touch more modern and better for bike riding.

It feels so good to finally have this skirt completed and in my closet rotation, a mark of the time spent to make it, by me and all the people in the supply chain prior.


Just enough (plenty)

short-stack-fall-capsule

Over the holidays I spent a restorative week with friends & family, partaking in traditions that were new to me, and new twists on the old familiar. In an effort to share the meaning of Hanukkah, we read some much-loved children’s books, including a very sweet story called Just Enough is Plenty. 

Lessons about latkes and generosity toward strangers and finding joy in relative abundance warmed my heart, and I can’t help but translate that message into this rambling reflection of my fall capsule, a balancing act of seasonal change & wardrobe paucity

Sometimes it’s really nice not to have a lot. Like, all my clothes in this capsule fit on a dozen hangers and into one large dresser drawer, the out of season-ers up above in two bins and another handful of hangers. And I rarely ever struggle with getting dressed in the morning, nearly everything is a favorite or at least a faithful piece that plays well with others and holds a certain amount of meaning to me. (like the outfit below, which I posted for my Slow Fashion October intro)

Slotober intro.jpg

But then:

your go-to jeans rip.

your boots fall apart.

your most functional cardigan is embarrassingly pilled.

your one mid-weight jacket doesn’t quite cover the climate.

So: the perks of selection, of alternate options to lessen the all-around wear & tear, the gratitude of being able to sub into rotation while the mending pile awaits.

it seems like the age-old time vs. money quandary to bring in reinforcements, and this season I seem to have skirted the two with happenstance.

The week after my jeans ripped (in the crotch area, again) while riding my bike (to work, for a meeting), my friend Lydia generously gave me a pair of sturdy Levi’s 501s that no longer worked for her. They’re just what I needed, and just in time.

The week after I received the pair of pants I pined for and planned and purchased, I realized I couldn’t quite budget for the boots I had my eye on too. Just then, a pair of Nisolo boots popped up on a resale site, gently worn and half the price. A sturdy substitute, ideal for the season.

And the Clyde pants? I hesitated at first, treating them with kid gloves and wrestling internally with the price. But then life sped up, pants ripped, and there they were: stylish, comfortable, wonderful, and much much appreciated. Truly, they’re worth more than the sticker price anyway.

And all of that queue? It largely remains in list form – on the internet, and on my studio wall.

Which is not to say out with the queue! Because if anything, getting by with a sparse capsule affirmed my plans — a limited addition of a few strategic items would certainly help my wardrobe function a little smoother and rest a little easier. And an addendum: for next year, I would add a jumpsuit to the mix, because the warm weather lingered and I really missed my blue linen jumpsuit but I knew it just wasn’t warm enough. I’m eyeing the new Mitchell Jumpsuit pattern from Hannah Garr, maybe in a heavy linen or light denim.

But in going without, in letting go of the pressure to finish it and make my pinterest dreams come true, I got by just fine. Maybe even turned the corner from fine to great, from overly focused to going with the flow. And in these past few months, the ‘capsule’ season has been dwarfed by the political season; the weather shift outweighed by the climatic shift in American identity; the wardrobe needs cast aside for community needs of time, money, presence, and pressure.

It turned out: just enough was plenty.

handknit-goods-2

I did finish the sweater (v.2) for Jenn (notes on Ravelry here), and moved on to a few warm accessories for me: a Roku hat, Aspen legwarmers, and Fibershed Knitalong shawl. I hope they’ll bring some coziness & security in this coming season of cold weather and chilling politics. In the very last days of fall I also finished my long-planned A-Frame skirt and will be back soon with details on that and with thoughts on a deep winter capsule.

Here & there, vol 2.: checking in

IMG_0726.jpg

Here 

Tumult. Travel.

Reading & journaling feels good; sharing words feels harder.

The work: Resilience & Resistance.

How I’m starting (so far): continuing to build community around regional, regenerative fiber systems. Connecting with my loved ones, reaching out to friends who’ve fallen out of touch and have experienced first-hand the fallouts of this brutal vote. Creating things with my hands, nourishing my soul and digesting the waves of emotions and experience. Gathering in the streets in solidarity and in mourning, gathering in safe spaces in joy and in grief. Committing to financial donations and plans for volunteering, organizing, and showing up. Calling my representatives, voicing my concerns, and demanding accountability.

There

Now. is. the. time.

Songs for possibility; a reminder to bolster our courage, compassion, & creativity.

+ 10 ways to fight hate

Where to donate, to begin

And what if the sun doesn’t come out tomorrow? Contemplating darkness & finding the light

Connecting climate change & our closets

A holiday guide for showing up & talking about racism. (really, an anytime guide for dialogue)

Call your people (the elected ones) (here’s a script)

Call your girlfriend (the smart & compassionate ones)

Holding these words close in quiet times & busy hands:

“Quilts, clothing, furniture, sign painting, and the crafts of the building trades all cross political lines, much like food. They also connect deeply to a battered vision of American identity that is in desperate need of a better angel right now. If we’re looking for a way to reach our fellow Americans, to have honest conversations with them about equality and dignity, craft can be a place to begin.”

& now I’m probably off making feminist gingerbread people

A sea of fresh indigo

5-2016-09-19-11-14-45

Is it obvious around here that I’m enamored with indigo blue?

You’ll find it in my yarn stash, on my cutting table, in my closet of course, in a bucket in my “studio” and this year, in my garden.

Japanese indigo, polygonum tinctorium to be exact.

Tended from wee seedlings in my sunroom (slash home office) to a patch in my landlord’s flower garden, I’ve been caring for my own little plot of blue, biding my time until the shiny green leaves begin to bruise and hint at the pigment within.

But what to do with the leaves? I sowed, composted, weeded, watered, and looked on adoringly while not entirely sure what I would do when it came time to harvest. Mostly because I wasn’t sure how much would crop up, and what method would be feasible.

See, I’m trying to avoid synthetic chemical intervention. Indigo is a peculiar natural dye, requiring the removal of oxygen before the color can bind to any material. This makes it magical, in a way, because when you pull something from an indigo vat you witness the pigment’s reaction with oxygen, changing from green to blue in midair.

A lot of recipes take natural indigo and add a reducing agent, called Thiox or Spectralite or, in a pinch, Rit Color Run Remover. To avoid this additive, there are a host of more-involved processes that involve fermenting the fresh leaves and feeding the vat things that will give it sugar and things that will raise the pH.

But these things are at once precise and imperfect, never a guarantee that you’ll get color at the end of your days brewing and calibrating — best done with an experienced eye.

At least that’s my take. So while I’m figuring out if and how to go the fermentation route with my backyard harvest, I decided to try dyeing with just one simple ingredient: ice water.

1-2016-09-19-11-01-30

I’d heard a rumor about this method a few years ago, and mentally bookmarked The Dogwood Dyer’s tutorial when I later came across it. Indigo expert (in my opinion) Rowland Ricketts has a few notes on it, and plant palette artist Sash Duerr raves about the resulting colors.

I trust these incredible people, so I gave it a try. And it’s really very simple, but you need a stretch of uninterrupted time and, if you’re like me, you need to put out extra rags and buckets because it’s always going to get a little messier than anticipated.

Simply put: harvest your mature indigo, cutting off the stalks (leaving room for regrowth if your season allows), then remove the leaves, blend them with ice water, strain that and use it as your dye bath.

2-2016-09-19-11-01-55

Specifics from a Saturday afternoon:

  • Prepare material by submerging in room temperature water for at least an hour. I chose skeins of yarn including local wool, secondhand wool blend (I think), and secondhand silk, all of which had been scoured previously, and the secondhand materials had been mordanted with alum.
  • Weight of goods: 625 g all together
  • Weight of harvested leaves: 206 g
  • Ice water prepared by emptying all available ice cube trays into a bowl, allowing to melt at room temperature for half an hour, then filling the bowl with cold tap water.
  • Leaves were blended in batches with enough ice water to move freely.
  • Strained blended mix using a mesh sieve, but the mix was too finely blended, so switched to using cotton gauze and squeezing it through.
  • Mixture was neon green and very frothy, tiny leaf particles impossible to strain out.
  • First dip: local wool skein submerged approx. 5 min.
  • Second dip: silk skeins submerged approx. 10 min.
  • Third dip: mystery wool skeins submerged approx. 10 min.
  • Fourth dip: local wool skein again for approx. 10 min.

1-process.jpg

Each skein of yarn came out of the bath a vibrant shade of neon green, like pure chlorophyll. When I’ve used powdered indigo vats (like so), I’ve noticed the oxidation process beginning almost immediately, transitioning to teal and then toward blue. With this process, I waited 10 minutes after the first skein and it was still a solid green, so I put it in the tub of water where the undyed skeins for soaking. By the time I finished a first dip of each yarn, the early skeins were starting to edge on turquoise, but still, it was the slowest oxidation I’ve ever seen.

Once I had cleaned up, I rinsed out excess dye and then hung the skeins on my portable drying rack, an ombre of jade and bright emerald. By mid-morning the next day, the outside of each skein was dry and aqua in color, but the interior strands were still damp and holding onto green. I found a two-part article that suggests the green continues to disappear as time goes on, but that the blue tones are fairly lightfast. You can see that even in this small series of photos, the color shifts easily with the quality of light.

At first I found the persistent green frustrating – I wanted blue! But the slow transition into turquoise is a magic all its own. And the most magnificent thing, for a Saturday afternoon in my makeshift setup, is the ease: no synthetic compounds meant I could splash with abandon (or at least, give in to accidental overflow), and compost the finished bath.

4-2016-09-19-11-07-46


Capturing summer

1-2016-09-026

The seasons are so dramatically different here, the changes are less like a marker of passing time, almost a sort of temporal amnesia.

I remember in spring — May, specifically — when the lilac that climbs the fence along our driveway began to bloom. The day we first looked at this apartment, the lilac was like a row of garlands below the windows as we walked through half-empty rooms, trying to picture ourselves here. By the time we moved, it had all but disappeared, the greenery no less spectacular than the abundant leaves and shrubs of the neighborhood. When it returned, I was giddy like it was our own private fireworks display, unfurling and completely unexpected.

Even in summer’s peak humidity (and this one, oh, it was humid) I would catch hints of our former, wintry life. Brushing up against my wool coat as I reached for the bucket of indigo vat below. An incessant bug bite on my hand nagging like dry knuckles.

This isn’t about lilacs, but about remembering — bringing a little bit of summer sunshine with us into the depths of winter.

1-2016-09-25-09-38-39-2

I didn’t get a chance to plant as much of a dye garden this year as I’d hoped. I started some indigo seeds in a tray, generously gifted by a friend from California, and some weld too, which didn’t take. I kept meaning to sprinkle a pack of marigolds and coreopsis in the front yard, but I couldn’t keep up with the weeds long enough to clear space.

I’m grateful for the opportunity to tend my indigo patch, which has been low maintenance thanks to well-timed rain showers, but found myself envious of the yellow and orange blooms all around, my eyes peeled to distinguish coreopsis from black eyed susans from the car window, spot tansy on my bike rides, or catalogue all the marigolds along my running route, mentally weighing the volume of goldenrod plumes.

1-ecoprint-curtains

Picking a few here and there wouldn’t hurt, I told myself. But you can’t clear cut your neighbors’ wildflowers, even if they don’t love them like you love them. (I told myself.)

An ecoprint seemed like the perfect way to honor summer’s colors and my neighbor’s property lines.

img_9216

Several months ago I found a perfectly crisp and white cotton sheet at the thrift store, and though it’s not the drapiest fabric, I knew it would be a cost effective way to get the amount of yardage needed for the double window behind our bed.

I roughly followed the ecoprinting instructions for the Flowers at My Fingertips kit in The Modern Natural Dyer: I cut the sheet down to size, weighed it, scoured it in the washing machine, mordanted with alum acetate, and gave it a wheat bran bath dip. Then, I strolled through my neighborhood and picked a few flowers here and there in streetside planters and the edge of the community garden. I focused on plants I’d heard were good dyeing: cosmos, marigolds, goldenrod, black eyed susan, and a yellow flower that looks like a version of coreopsis.

My goal was to try to make a geometric print by plucking out petals and leaves and laying them out like mandalas. I knew the whole bundle had to fit into my dye pot, so I measured the full width of the pot and then used that to determine how to fold and layer the fabric — essentially I divided width into quarters and only placed flowers on the middle half, then folded the blank edges over to meet in the middle.

img_9202

Some tips: use freshly picked flowers, keep the material damp, and put down a tarp! It took me most of a day to lay out the flowers along the length of the fabric, since I had various errands and things to do periodically, so having the tarp underneath was important to protect the floor, and a spray bottle of water helped keep all the pieces in place.

The result is a bit of a kaleidoscope blur, swirls of yellow and orange, petals and leaves dancing across the surface. This was my first time attempting a pattern with bundle dyeing, and I love the result but I also had an ‘aha’ moment when unrolling it: to achieve a more defined pattern, you actually want to avoid repeating the same placement (for instance, the mirrored goldenrod blooms, above) and place the material in a staggered arrangement so that when you roll it up the elements will overlap very little or not at all.

Already I feel the days shortening and the quality of light shifting, but stitched into curtains and backlit by sunrise, this print lets me hold onto summer just a little bit longer.

1-2016-09-25-09-37-07

Project planning for fall

10-2016-09-18-14-51-09

Back to my point about project planning: whether or not you actually want to make/use/live with a capsule wardrobe, the free Capsule planner can be a helpful tool to plan wardrobe addition. I’m going with a fall capsule wardrobe, but I think the foundation of taking stock of what I have, identifying what’s working & what’s not, thinking about weather and lifestyle and any needs for the upcoming season allows me to easily identify and prioritize pieces I want to add to my wardrobe, capsuled or not.

From my wardrobe planning process, I have a clear color palette, an idea of my favorite silhouettes, and an inventory of what I have and what gaps exist in my wardrobe. I have a good number of boxy tops that I love, but am pretty low on pants and skirts to pair them with (especially pieces that are in good condition and can be dressed up a bit).

The Capsule planner also offered a nice time to reflect on my goals: moving slowly, keeping my closet pared down, and working with my stash. So now, the part I daydream about the most! What to make? How will the things I make pair with what I already have and love?

Since I generally enjoy making most of my wardrobe, I use the shopping list part of the Un-fancy Capsule planner to think about what projects to prioritize. But, considering my current need for pants and the learning curve to make a pair (which I don’t have time for just yet), I decided to invest in a pair of Clyde pants after many many months of contemplation and budgeting. I also need another pair of shoes, ideally boots, which is a bigger budget item, so I’m trying to keep my project budget lean and finish up a few WIPs.

Roughly in order of priority:

1-fall-capsule

Loose inspirations & interpretations: 1 | 2 | 3 | 4 | 5 | 6

I wouldn’t say this planning method is totally foolproof — I could still end up with clothing that doesn’t quite fit or isn’t durable, or doesn’t ultimately move into regular wardrobe rotation. But I have a natural tendency (ok, borderline obsession) toward planning and I think laying it all out ahead of time is really helpful.

I also know that this fall — really, the rest of 2016 — will be very busy for me, and there’s a chance that I won’t get through even half of the items on my list. Through my summer capsule wardrobe experience, I learned that making one full garment per month is a reasonable pace, so with my fall planning I’m trying not to set my expectations too high, and by prioritizing, I can focus on each item in due course. Still, if I don’t get to making or finishing the items on my list, I know that I have plenty to wear and lots of great options in my fall capsule.

This is my current practice of balancing excitement, inspiration, and desire, with gratitude, responsibility, and time management. Do you have a fall list? I love learning about how others plan (or don’t!) their projects, and welcome your thoughts in the comments!

Fall wardrobe & capsule planning

1-2016-09-18-14-31-03

By mid-summer, I was pretty desperate for fall to breeze on in and cut the humidity, but now that it feels like fall is in the air, I’ll admit I’m a little sad to see the sunshine waning. But what better way to embrace the changing season than a little wardrobe shift?

I feel like my original notes on using a capsule wardrobe planner to plan projects were rambly to the point of being unhelpful, so I thought I’d share my current wardrobe planning & project planning process in practice, broken into two posts.

Taking Stock

I find it’s helpful to start by getting a full view of what I already have. I printed out the Un-Fancy wardrobe planner (which is called Capsule, but doesn’t necessitate that you actually make a capsule wardrobe, if you’re not interested in that sort of thing) and decided to focus on planning for mid-September through end of November. In this part of the world, fall can be long meander toward winter, or a sudden plunge into cold, so I’m curious to see how well a capsule wardrobe will work. Using the planner, I’m framing the upcoming season in terms of:

  • Weather: I literally wrote “who knows?!” but most likely “crisp, breezy” and mid-70’s to high 40’s over the course of the next few months
  • Lifestyle: the largest portion of my pie chart is working, but I either work from home, at my co-working space, or at cafes, so it’s pretty casual. I want to continue biking and walking to work as much as possible, so that’s a consideration for my wardrobe, and then in my free time I have: sewing/knitting/dyeing project time, exercise and weekend adventures, and lounging.
  • Special events & travel: an exciting work trip to the east coast at the end of October, and then another fun work trip to the Bay Area in mid-November. My goal for both trips is to have a few simple options for looking put-together and representing sustainable fibers/textiles (or at least, not fast fashion).

With these factors in mind, I like to pull all my favorite things from my closet and any storage boxes, and into neat piles on my bed — whatever I’m most excited about gets pulled first, which basically fills the “pieces I own + love to wear” section of the capsule planner, I jotted those down, and then kept adding to the piles. I did this on a Saturday afternoon and made sure to open the curtains wide and put on some music I love, so I can see everything in good natural light and enjoy the process.

Then I turned around to my closet and looked at what was left, which generally fell into two categories: summery things that I want to save for warm weather, or things I’m not excited or able to wear. I made piles for donating, selling, or packing away different items, and then made piles for laundry (hand wash or block, gentle cycle, and regular) and mending to get everything into shape before moving on.

I used the capsule planner to note “pieces I own + never wear” which included two pairs of jeans that don’t fit well (selling & donating them), a vintage chambray tunic that I want to like but have never actually like the fit of (sell if possible), a Hemlock tee I sewed a while ago that has an awkward sleeve fit (alter), and some fancy dresses that hang in the back of the closet (donate and gift a few, keep two I’m not ready to part with).

Lastly, I took stock of the pieces I love and am keeping — do any need mending or alteration? Based on this selection, do I have any holes in my wardrobe? The obvious thing is that my favorite pair of vintage boots (purchased last fall) are totally destroyed and need to be re-soled and likely replaced sometime soon too (a cobbler actually told me that the boots aren’t worth fixing, but I’m unwilling to give in). Less obvious but notable on closer inspection is that my three favorite jeans have all ripped in substantial places in the last 6 months, and each has been mended, some more visibly than others. Since these are the only ones left, after parting with two that didn’t fit well, I want to prioritize more pants and skirts so I have something more durable, and presentable if needed.

1-2016-09-18-14-32-37

Capsule Planning

Overall, I really enjoyed my summer capsule wardrobe experiment (which I reflected on here), so I’m giving it another shot for fall. I already pulled together some inspiration from the fall styles I’m gravitating toward, but I used the capsule planner to expand it a bit:

  • Word association: layered, casual, creative, contemporary
  • Brands I admire: Elizabeth Suzann (minimal, chic), Lauren Winter (F/W campaign especially – creative, layered), Study NY (upcycled, quirky), Hackwith Design House (contemporary, minimal), First Rite (creative, “cool”), Caron Callahan (utilitarian, interesting)… I save favorites from these talented designers and more here.
  • Brands I draw from to make my wardrobe: Grainline Studio, Sonya Philip, Fancy Tiger Crafts, A Verb for Keeping Warm, Brooklyn Tweed, just to name a few.
  • Colors: neutrals (cream, black, natural/undyed tones) and grays (as noted here), deep indigo, and warm and bright accents in red, maroon, and yellow/mustard/gold tones

1-2016-09-11

My “top 8” pieces for this capsule are:

  1. Black silk blouse (thrifted)
  2. Ondawa sweater (handmade, details here)
  3. Hackwith Design House tunic (purchased at sample sale)
  4. Linen pocket tee (handmade, noted here)
  5. Khadi Prism dress (handmade, posted here)
  6. Chambray vintage dress (flea market purchase)
  7. High-waisted, cropped jeans (thrifted, modified)
  8. Sven clogs (purchased)

Based on my favorite pieces, what’s working for me? Definitely boxy, loose tops, either cropped or tunic-length; vintage denim and chambray; and details like split side seams, kimono sleeves, or dropped shoulders. Fabrics I love to wear are natural fibers including silk, tencel, denim, chambray, linen, wool and alpaca.

1-camera-pics

Since I decided I wanted to go ahead with a full capsule wardrobe, I basically turned everything I had put onto the bed into that list:

  • 3 pairs of jeans & 1 pair of pants
  • 6 dresses (5 made by me)
  • 8 short-sleeved tops (4 made by me)
  • 6 long-sleeved tops (2 made by me)
  • 5 warm layers (all made by me: a cotton knit Linden sweatshirt, Escher sweater, Hayward sweater, Ondawa sweater, and Liv Light cardigan)
  • 2 jackets (1 made my me)
  • 4 pairs of shoes (sneakers, clogs, chelsea boots, loafers)

All of the above steps and contemplation laid the foundation for planning out a few items to add to my wardrobe, which will fit with my fall capsule, my goals of reducing my stash, and my love for making things. More on that next!

Marled sweater inspiration

1-marled sweater insp1

1 | 2 | 3 | 4

I’m in total agreement that the best prize of a knitalong is the resulting knitwear, however, I was totally floored to win a sweater’s worth of Brooklyn Tweed Shelter yarn as WIP of the Week.

And it’s funny, because when Brooklyn Tweed released the Shelter marled colorways, I was sketching out my Fringe & Friends KAL plans and part of me (ok, most of me) wanted to ditch the Shelter sweater that needed un-doing and re-using to get my hands on those beautiful neutrals.

So I’m still in disbelief that I get to both reuse the existing sweater’s worth of Shelter (a treasured gift to Jenn), and then I’ll get my own sweater’s worth of Shelter gifted to me. Crazy.

But what to knit?

My first thought for a Shelter sweater went to Bronwyn, which totally stole my heart when it was released, but I wonder if the texture would get lost or feel too overwhelming in a marl. I actually already have a marled, cabled sweater — my Ondawa (shown below) is in a very similar colorway to “Caribou” and I love it, so I think another camel marled sweater would be too similar. That leaves me deciding between “Newsprint” in black & white, and “Narwhal” in grey & white.

1-marled sweater insp-001

1 | 2 | 3

I love the contrast of Newsprint and I remembered Jen Beeman’s gorgeous self-designed Stone Lake marled sweater. Less cabled than Bronwyn, but it makes me think Bronwyn could look nice in the Narwhal colorway since it’s lower contrast.

But, while I love knitting within the natural “grey rainbow,” I feel like Newsprint would be a nice treat as a change of pace — something less common in the small farm yarns I usually gravitate toward. In fact, the other sweater quantity of yarn in my stash is a medium-dark grey from a local small farm & mill, purchased with Exeter in mind. Maybe the marl wants to be something simpler, a break from cabling…

BT newsprintvia

So then I thought about shape and style elements — what shape would best complement my existing sweaters? I have a simple, v-neck pullover that’s a hand-me-down from my dad, a men’s cashmere sweater that shrunk one too many times to fit him. It’s inky black and luxuriously soft, albeit moth-eaten with elbows that look like swiss cheese. I adore it.

Maybe a pullover with a nod to the soft, slouchy shape of this sweater I love? Immediately I thought of Lucinda, whose clever purl-side-out would certainly showcase the marl beautifully. My only hesitation is that Lucinda’s lovely drape and texture seems to come from yarns with a mixed composition, usually with a bit of silk.

Browsing some of the other Madder designs by Carrie Bostick Hoge, I remembered the newly-released Junegrass pullover, showcasing the gorgeous Colorado farm yarn Junegrass by Fancy Tiger Crafts, which includes one of my most favorite garment details: a split side seam.

Which leads me to my current daydream: a black & white marl Junegrass, with a neckline more like Lucinda (perhaps using my top-down customization skills learned in the knitalong), and a sleeve length slightly in between 3/4 and full sleeves (to match the feel of my well-worn and loved black pullover).


Summer capsule reflection

10by10 large

What I wore

Looking back, I had a few clear summer silhouettes:

  1. Sleeveless, boxy cropped shirt + high waist + sandals. In heavy rotation were my self-drafted crop top, my blue striped t-shirt, my knit beach tank, mixed and matched with my cut-off jean shorts, vintage linen wide-leg pants, thrifted high-waist non-stretch jeans, and paired with my Birkenstock sandals or Zuzii sandals (which I bought for a wedding and have proved quite versatile).
  2. Breezy dress with pockets + sandals or sneakers. For me, dresses are the easiest thing to wear in the summer, and can be styled a little differently (more casual or a more refined) depending on shoes or jewelry. My most-reached for this summer were my wabi-sabi Dress No. 1, my hacked V1482, and my Charlotte Kan tie dress (see below). I love me-made dresses because I can make sure the length is in my comfort zone, and I can always add pockets.
  3. Wide-legged jumpsuit (sometimes layered under a top) + sandals. For hot and sticky weather, and bike riding all over town, my two jumpsuits were perfect and fun: one is a vintage linen style that I bought on ebay and dyed in indigo, and the other is a black organic cotton Sallie jumpsuit that I made last summer.

And a quick shout-out to a couple of me-made favorites that were in heavy rotation but never got a full blog post: tops and dresses made from Charlotte Kan Pocket-T and Tie Dress patterns:

CK recap

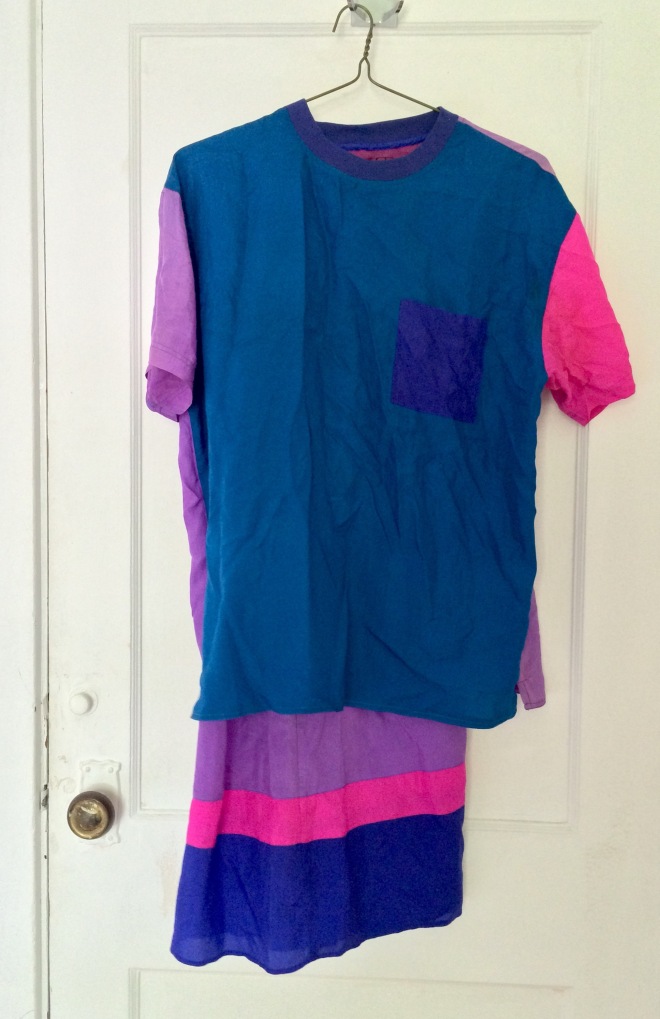
From left: I first made the Tie Dress in a linen-cotton blend last summer as a birthday present to myself, and then I volunteered to pattern test the Pocket-T (so I received the pattern in exchange for my review; I used deadstock Cupro from Feral Childe) last July. Last fall I made a cropped version (with split side seams) of the pocket tee in Merchant & Mills Irish linen, and in the spring I used the sleeve shape and waistline to create a heavily modified V1482 (a.k.a. Rachel Comey sack dress). If you’re interested in more details on any of those, feel free to ask in the comments, or let me know if a full post would be helpful.
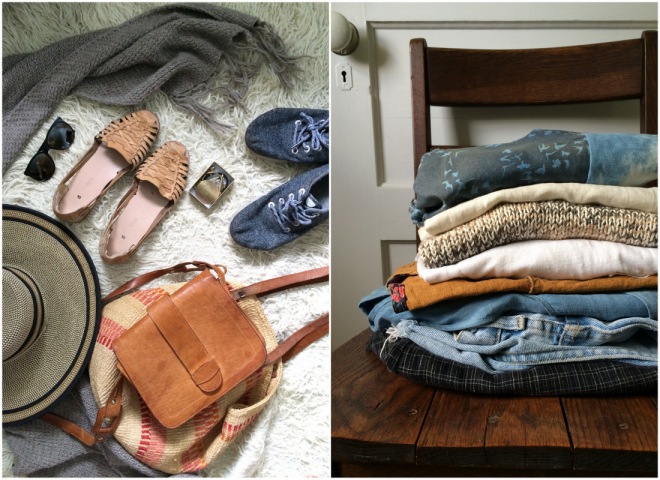
What I didn’t wear

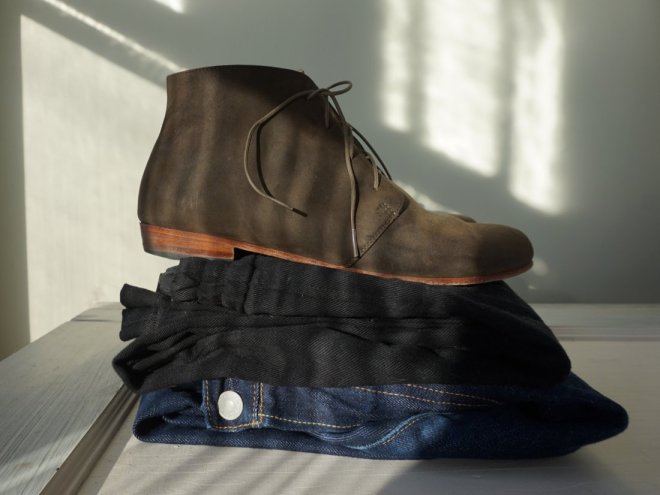
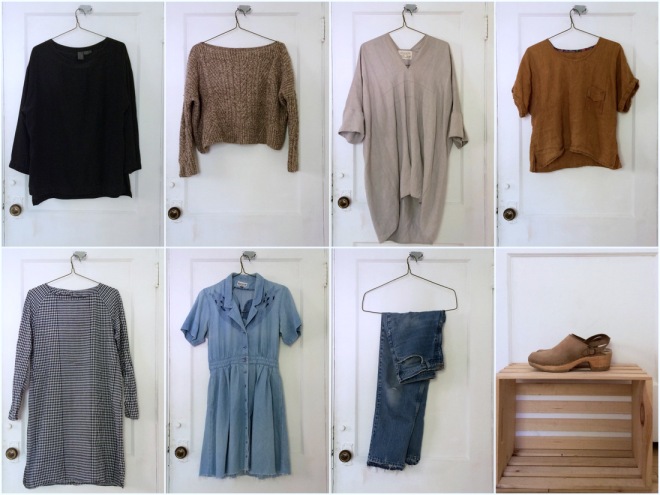
This summer was non-stop heat and humidity at home, and really didn’t cool down in the evenings at all, as it does in other places I’ve lived. This meant that I rarely/never wore any of my warm layers (light sweaters or jackets) except for travel. I also hardly wore my stretch denim jeans or my Prism dress because long sleeves and pants just never seemed like something I wanted on my body. Since my summer capsule extended into early September, I was able (and excited!) to bring these items into the rotation at the very end of the time span.

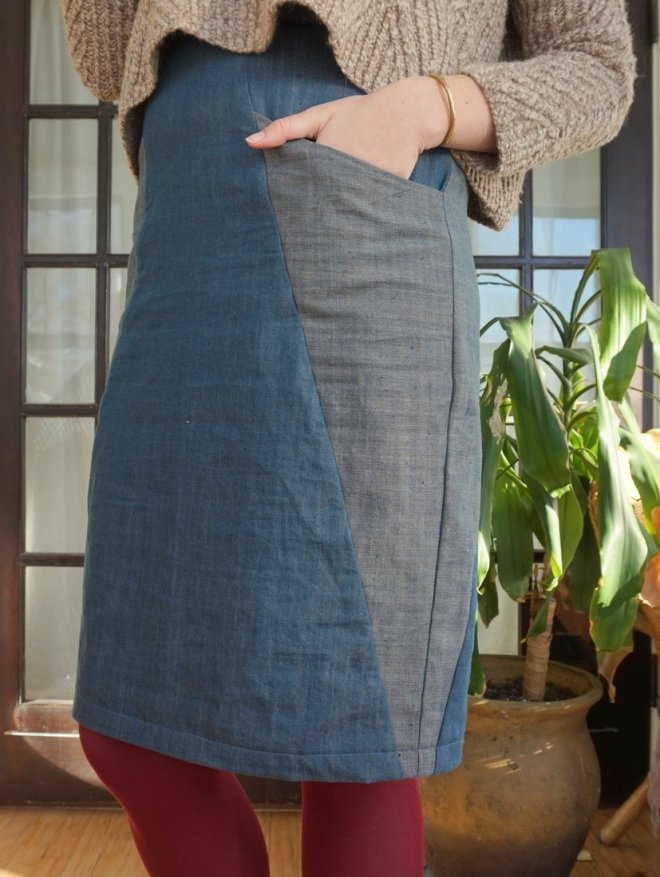
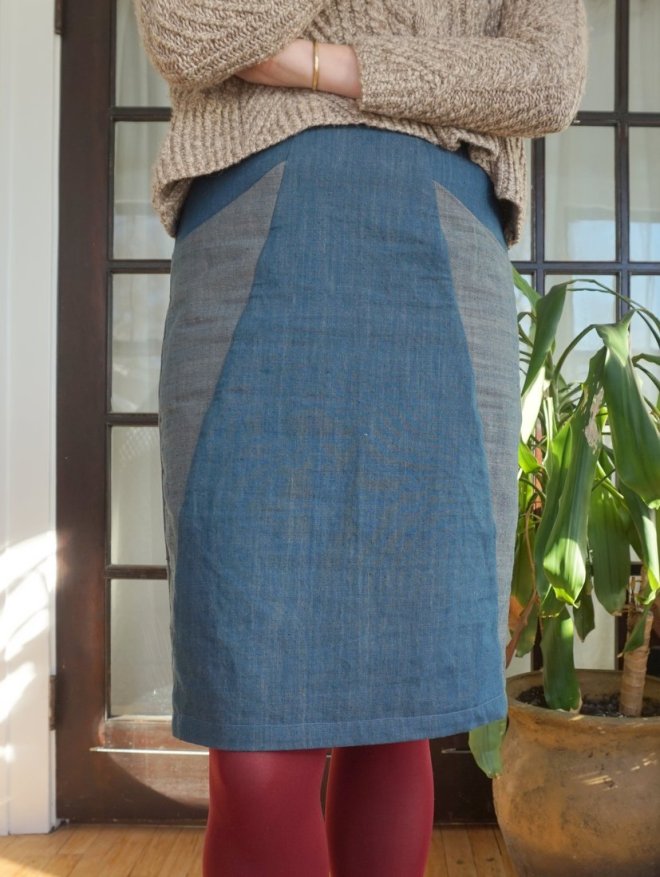
I didn’t wear my black high-waisted shorts often, but I still love them so much. They’re just a little too short for riding my bike or workwear but they’re great for going out with friends or dates. I also pretty much never wore my wrap skirt! I need to make it a faux-wrap skirt because it always feels too fussy so I don’t reach for it.

1-collages3

What I made (and what I didn’t)

  1. Just before I officially committed to my summer capsule, I made a self-drafted crop top and it was easily a summer fave (also made one for a friend), worn alone or layered over a jumpsuit or dress.
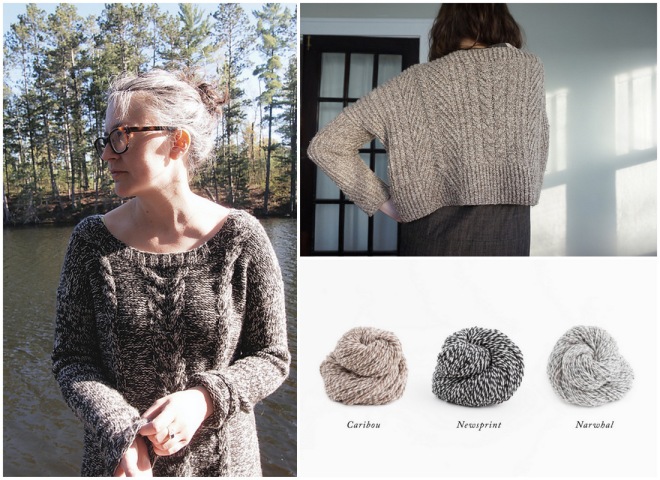
  2. At the start of June I also finished knitting a lightweight shawl, which I intended to wear for my brother’s wedding but didn’t really end up needing. I think it will be great for fall and spring layering though.
  3. In June I made a rather wabi-sabi Dress No. 1, which exceeded my plans and expectations in how fun it was to make and wear (dressed up for a friend’s wedding, as well as my brother’s wedding rehearsal party, and dressed down for daily wear).
  4. In July I braved the unending humidity to draft and stitch my “Best Woman Dress” (full post coming soon! Inspiration post here)
  5. For a quick travel project and stash-buster, I knit a bright red Diode hat
  6. In August, I cast on a new sweater for my partner as part of the Fringe & Friends Knitalong.
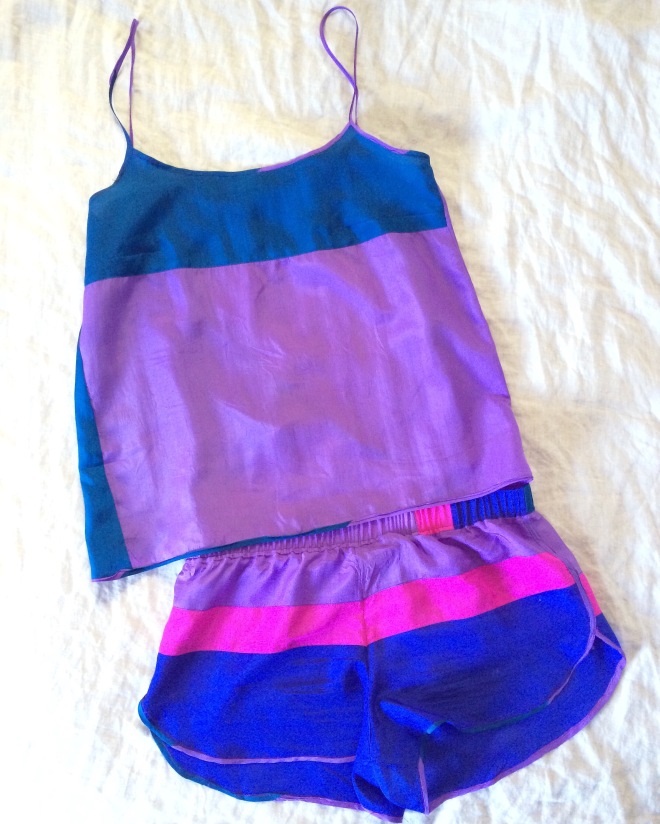
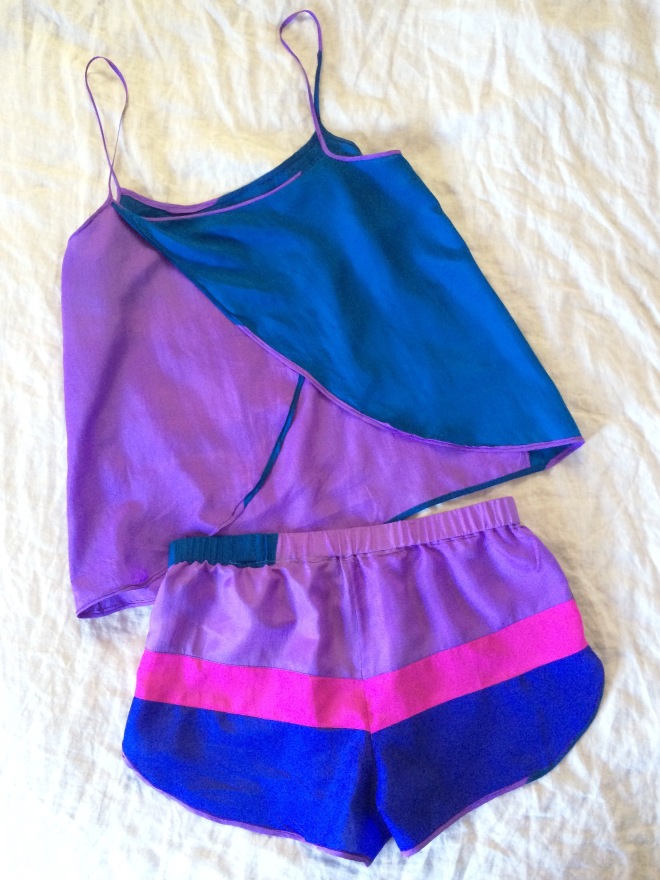
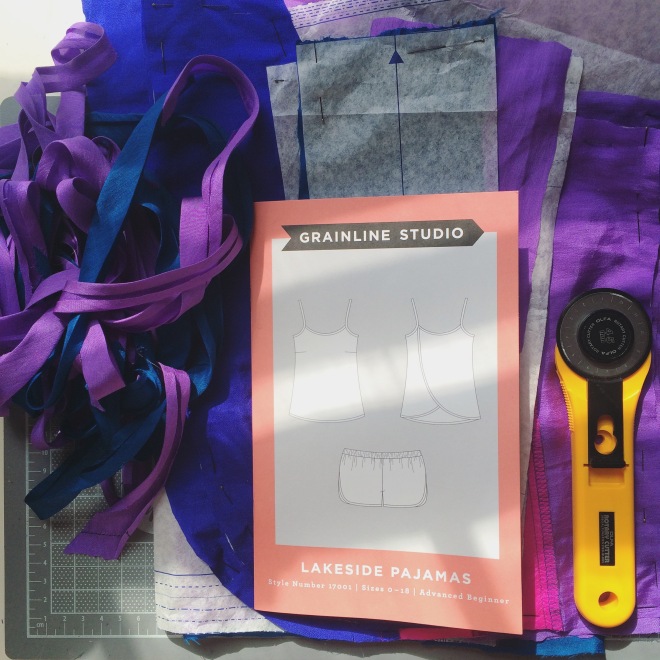
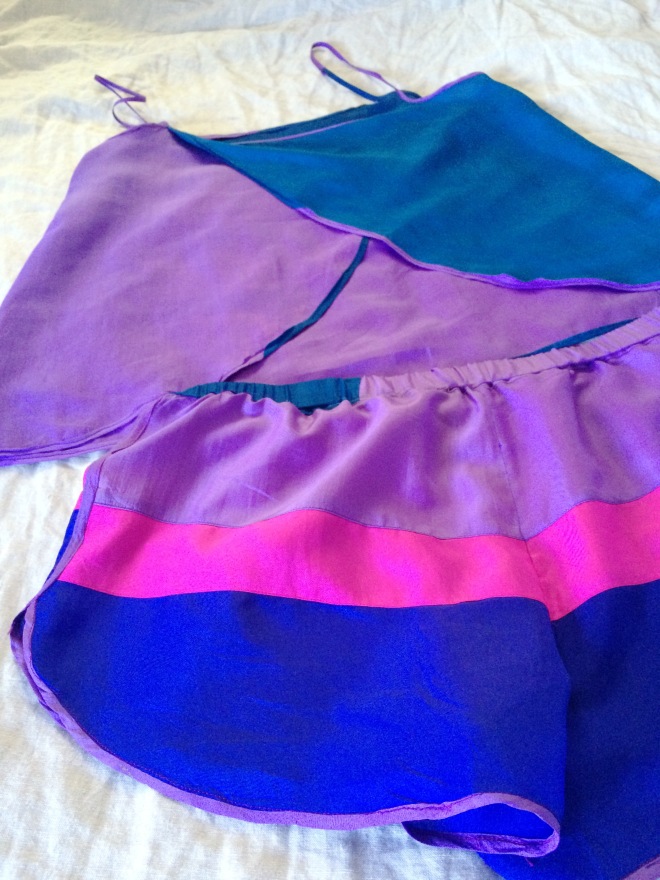
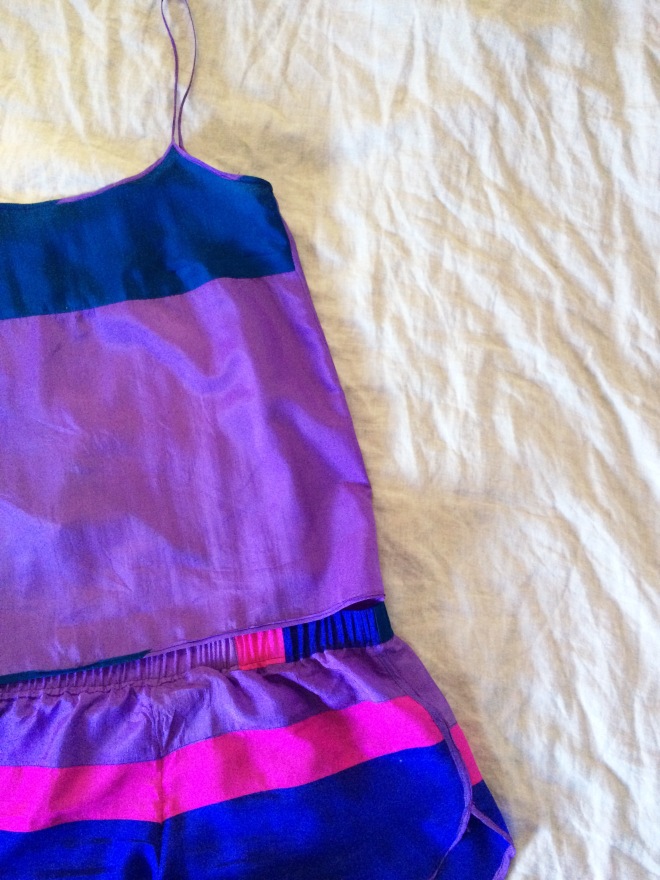
  7. In the very first days of September I finished a set of silk Lakeside Pajamas

I had hoped and planned to draft and sew a tunic that I had envisioned when I received a beautiful piece of khadi from A Verb for Keeping Warm as a Me-Made-May contest prize (which I didn’t even realize I had entered!). I can see how the tunic would have fit into my capsule and silhouettes, but I didn’t necessarily feel that it was glaringly missing. I just didn’t have time, and I’m sure it will still be inspiring next spring/summer.

I also didn’t finish the Penny Raglan I had planned. I actually started making it, and it’s not too far from being finished, but I just don’t think I’ll wear it. I love the penny raglan shape but I made it out of a linen-cotton blend curtain I found at Goodwill, and it’s too sheer for my comfort level. I’m debating between tossing the unfinished garment in the scrap bin, or finishing it and giving it away.

Looking at this list, I essentially made one garment per month, with one smaller project added in or wrapped up. It’s really helpful for me to better understand my pace so I can be realistic with planning my projects and purchasing supplies, and it’s also nice to realize that I posted about nearly all the finished garments here.

This feels good as in the past I’ve been somewhat on the fence with blogging, but I’ve really been enjoying it as a writing outlet and a place to record notes (like this post, which has been a running draft for several weeks now) and inspiration. Sometimes I just don’t want to spend any of my free time on a computer (since my work involves a lot of screen time — that’s why my tactile hobbies are so nourishing for me), and other times I’d rather move into the next project instead of re-hashing what I finished, but I value the opportunity to appreciate each project and learning process.

10 x 10 outfits

What I learned, and notes for next year

My biggest takeaway is that I actually didn’t feel limited by my capsule wardrobe — I had plenty to wear, and even felt a bit more adventurous trying to experiment with new ways to wear what I already love.

Toward that end, I played with styling by trying a 10 x 10 challenge while on a 10 day trip, and it was really fun! I love layering and that can get tricky in the summer. Honestly, I have no issues with repeating outfits, but the 10 x 10 challenge to make 10 items feel like 10 different styles was really interesting and showed me that my clothes have greater versatility than the way I typically wear them. It also allowed me to pack a light carry-on and still dress appropriately for a few days at the beach, a wedding weekend, and a few days in New York City. I thought about doing a full post on it but then I fell behind (and subsequently gave up) photographing the 10 outfits. The items from my 10×10 experiment are featured in the collage at the top of this post, and the first two looks are shown above (travel day and beach day).

Part of what draws me to the capsule wardrobe exercise and using capsule planning to pare down my project list a bit, is that I get stressed out when I’m growing my stash by buying things I don’t have time to use or make. My summer capsule was successful in helping me hone in on a projects I really wanted/needed to make, and stick to working through my stash!

To be completely transparent, I did buy a few things during this capsule stretch, like the Lakeside Pajamas and Penny Raglan patterns. And when I visited Fancy Tiger Crafts I bought lots of underwear elastic, and two cuts of hemp knit for shirts for Jenn. But I didn’t buy any new fabric for my own wardrobe. And I fought a very intense urge to throw my plans (and budget) out the window to make a stripey Fen dress — that was a fascinating rollercoaster of desire to witness within myself, and might become its own post soon.

My summer capsule wardrobe also affirmed my love for jumpsuits: if I had to live with only one item of clothing, it would probably have been my indigo linen jumpsuit this summer (it’s a vintage Flax jumpsuit that I bought on Ebay and overdyed at home). I recently read an interesting post on the question of whether a love of styling is at odds with a minimalist approach to fashion, and the author brought up how garments that are versatile don’t have to be basic. For me, jumpsuits are a prime example. You know all those “wardrobe essentials” lists on Pinterest and in fashion magazines? They often include items I don’t own or rarely wear, like a classic blazer or pencil skirt, whereas because I love the jumpsuits I have, they’ve become essentials.

A few notes for next year’s warm season:

  • My Nisolo sandals are really a half-size too big, and wearing them in very wet grass for an evening didn’t help that. It might be wise to replace them.
  • I’m pretty good on lightweight sweaters — I have three that I love, which cover different shapes, and meet my needs for this climate.
  • I love my Zady linen tee but it shows wear more quickly than other items, so it would be a good item to duplicate. Either with another of the same – maybe in black or stripes so I don’t need to worry about staining so much, or I could knit a similar shape in Quince & Co. sparrow (I’m looking at you, Moon Tee).
  •  I think another shift dress in place of my Prism dress would be good, and especially one with pockets — I’m head over heels for Lily Schlosser’s Fen dress in stripes, so that might jump to the top of my spring/summer list for next year.

So there you have it – my first official capsule wardrobe and wrap-up. I plan to keep going with this pattern for a while because I’m enjoying it and I think it’s a valuable tool for my goal of a maintaining a small closet. What do you think — are you interested in a capsule wardrobe, would you try one? Do you plan your wardrobe and/or projects in other ways? Do you love having an expansive stash?

Upcycled silk lakeside pajamas

img_9485

A slinky, breezy pajama set – or – a slice of humble pie.

What do I mean?

That I am both grateful to have these lakeside pajamas to wear on muggy nights and perhaps more grateful to no longer have them on my sewing table.

That even though I’ve been sewing most of my wardrobe for nearly 3 years and was starting to think my topstitching and bias binding skills were halfway decent, there is still so much to learn and practice.

Ok, what I really mean is that these pj’s are what my dad would call a “ten footer” project — they look great from 10 ft. away, but upon closer inspection the stitching is what I would call a hot mess.

IMG_9487.jpg

No matter, they’re still wearable. And at some point after wrestling with approximately twenty-six feet of bias binding to complete the tank top and first step of the shorts construction (an exaggeration, but still), I gave in to the struggle and decided that thread matching isn’t always necessary. Which, maybe, is a lesson in going easy on yourself, especially when it’s 9 pm on a holiday spent working the same as any other day.

Also when the color blocking would have made thread-matching a particularly time-consuming challenge. But the color blocking itself is a fun detail that was surprisingly easy since I was working with an already color-blocked silk skirt and shirt combo, picked up from a tag sale several years ago. I’m not the best at identifying silk fabric types, but I think this would be classified as a lightweight china silk — plain woven, no backing, some sheen.

img_8834

Whatever it is, remind me not to attempt to work with it anytime soon. Whereas my upcycled Alamada robe is a fluid, drapey silk, and my best woman dress is a mid- to heavy-weight stretch silk (which I only discovered while testing my stitches – more on that another day), this was a flimsy, slippery little devil that seemed to prefer to skew to the bias, and did not want to stay in a straight line under my needle.

img_8843

But the pattern itself, even with all the bias binding, is a gem. I love the overall look, with the slightly retro gym shorts and flattering a-line tank. The clever layered back pieces of the tank offer a breezy vent for hot nights without being too revealing, which I love; the shorts, however, are super revealing and would definitely not make it outside the house even if the stitching were better. But then, I knew when I was cutting that I would probably want to lengthen the inseam, but I chose not to because I was fussy-cutting to arrange the pieces on the various color-blocked portions available.

IMG_9491.jpg

Fitwise, I find both the upper-bust of the tank and the low hip of the shorts to be a little tight on me. I cut my usual Grainline size 10, although my hip measurement actually matches an 8 — I think the slight tautness might be due to the fabric, which doesn’t have much give. It could also be due to the french seams I was determined to use but not so dedicated to measuring properly. But after one night wearing them, they loosened a bit and are perfectly comfortable. Next time, I would lengthen the inseam of the shorts, remove the length I added (on a total whim) to the straps, and add a little room to the upper bust.

Just as having a fancy, handmade silk robe feels like a treat, having a stylish, matching pajama set feels surprisingly delightful. I can already imagine that next summer I might want to make an alternate set, this time in a light linen or organic cotton voile, with more precise stitching and a few fitting tweaks.

img_9492